Showing posts with label Cocoa powder. Show all posts

Sunday, 20 December 2015

Sugar Cookies shaped as Gingerbread men


Vaanya, my four and half year old daughter, is at a stage where she is enjoying the world of fairy tales and stories. During the Durga Puja holidays, she got a scrapbook assignment from her Montessori to illustrate her favourite story. Vaanya chose to draw pictures of Goldilocks and the three bears. After the school reopened each story from the scrapbook was read in the class. 
Vaanya's classmate Alvira had chosen The story of Gingerbread Man. Alvira's mother, knowing my passion for baking requested me to bake some Gingerbread cookies for the class. The happy baker in me jumped on the chance to make these cute cookies. We decided not to go the traditional way of adding ginger and spices to the cookies and planned to keep them simple. 
These simple sugar cookies are inspired from Sayantani's blog and I have added a wee bit of cocoa powder to give them a little colour. The cookies are shaped in the Gingerbread man and are decorated with melted white chocolate. 
I was happy to see kids with their gingerbread shaped cookies merrily chomping on it. These cookies are a perfect Christmas treat.


Recipe source : A homemaker's diary

Ingredients : yields about 3 dozen cookies of medium size
  • 3 cups all purpose flour
  • 1 cup powdered sugar
  • 200 gms butter, room temperature
  • 1 egg
  • 1 tsp baking powder
  • 1 tsp vanilla essence
  • 2 tbsp cocoa powder
Procedure
Preheat oven to 170 degree Celsius.
Take butter and sugar in a bowl and beat till it gets light and fluffy.
Sieve all purpose flour, cocoa powder and baking powder.
Add egg and vanilla essence to the butter-sugar mixture and mix well.
Add the flour mixture in 3-4 additions and keep mixing. 
Knead into a dough and wrap in a plastic or cling wrap and refrigerate for an hour.
Take a little of the dough and roll it to the desired thickness, preferably 1/3rd of an inch.
Cut cookies in desired shape and place them on a butter paper lined baking tray.
Bake cookies for 8-10 minutes.
Allow to cool.
Decorate the cookies with melted white chocolate piping or icing sugar mixed with little water. You may add food colour to make colourful icing.


Happy Cookie enjoying
Amrita

Thursday, 4 June 2015

Brazilian Carrot Cake


Baking is my weakness. Period. 
And when I meet people from different countries, I end up talking to them about their confectionery culture. To the western world, baking is quite their way of life unlike ours. Therefore I love to know and understand about the different techniques and ingredients that goes into their baking. 
Recently I got an opportunity to meet a Brazilian brother sister duo who had come to Kolkata to learn and experience the intricacies of Indian food. And they were here only for a week! Vishal, my husband, had the responsibility of introducing Indian food to them and also give them some quick classes. Thus started one crazy week of the most concised course on Indian food. They went back with aching stomachs and 'please no more food' on their lips and absolutely mesmerized with the variety of spices, techniques and ingredients that we use.
As soon as I found my opportunity, I questioned them about their cake culture. While they went on explaining to me in their broken English about the different varieties, this particular cake caught my fancy. A carrot cake has been on my baking list(like a hundred others) for a long time. I have always been of the opinion to bake with the red juicy variety that you get only in Winters. When I learnt from them that the bright orange variety is the ones they bake with, I knew it was my 'Voila' moment. 
Unlike the popular American version of carrot cake, the Brazilian carrot cake uses raw carrots blended and then added to the batter. I knew I had to bake this one before I add yet another bake to my list. The cake gets a beautiful orange hue with the use of those bright coloured carrots. With very simple ingredients and instructions, making this cake is a breeze and with a simple chocolate frosting dressed on top of the cake, this cake is a must try.  


The darling daughter loving the cake and happy mommy clicking away :)

Recipe adapted from : Allrecipes

Ingredients : Yields a 5" long loaf cake

  • 1 medium sized carrot
  • 1 egg
  • 3/4 cup powdered sugar
  • 1 cup all purpose flour
  • 1/2 cup oil
  • 1 tsp baking powder
  • pinch of salt
Chocolate Glaze :
  • 2 tbsp cocoa powder
  • 1 tbsp powdered sugar
  • 1 tbsp milk
Procedure : 
Preheat oven to 180 degree Celsius.
Grease and flour a loaf baking tray or a round baking tray.
Peel and chop carrot in small chunks and place in a blender with oil. Blend it well.
Add egg and blend again. 
Pour this mixture in a bowl.
Mix in the sugar, all purpose flour, baking powder and salt. 
Pour this mixture into the prepared cake tin. 
Bake for 25-30 minutes or till a toothpick inserted in the middle comes out clean. 

Mix all the ingredients under the chocolate glaze and spread on the cooled cake. Refrigerate for the icing to set well.
Slice and serve.


Happy carrot cake enjoying
Amrita

Thursday, 23 October 2014

Eggless Choco lava cupcakes


I have been wanting to try my hands on the eggless version of a cake/cupcake for the longest time but being an egg eater I have never gathered enough courage or reason to try one. I mean after all a cake is meant to have eggs. How can any substitute work as good as eggs. Therefore I have been procrastinating the entire idea again and again.
With my recent jump in baking professionally, I realized the need to experiment with eggless baking.
I personally am not fond of the eggless milkmaid cakes so I jumped upon this eggless chocolate cake recipe which uses vinegar and baking soda to react and make the cake rise. 
With Diwali as an occasion where people like to indulge in eggless bakes, I realized the perfect opportunity and the required push. I decided to go chocolate all the way and made the easy batter which went into the cute mini cupcakes and got baked. All through I had my fingers crossed and had several questions in the head. When I finally saw them rise and baked, I was happy and surprised to see the softness of it. It tasted more clumpy to me as I am not used to eggless cakes but once I filled them with some runny chocolate ganache and dressed them with some whipped chocolate cream, they looked adorable and tasted yum. 
These mini cupcakes were placed on little diyas to match the festivity.
With my Sweet day falling tomorrow, I add this recipe to the list celebrating another month of the endless joy that our daughter brings into our lives. 


Ingredients : Yields 6-7 mini cupcakes
  • 1/2 cup all purpose flour
  • 1 tbsp cocoa powder
  • 1/4 cup sugar, powdered
  • 1/4 tsp baking powder
  • 1/8 tsp baking soda
  • pinch of salt
  • 3 tbsp melted butter
  • 1/2 tsp vanilla essence
  • 1/2 tbsp vinegar
  • 1/2 cup boiling water
Chocolate Ganache : 
  • 1/4 cup chopped dark chocolate
  • 2-3 tbsp cream (I used Amul)
Procedure : 
Preheat oven at 180 degree Celsius
In a bowl, mix all purpose flour, sugar, baking powder, baking soda and salt. 
Make a well in the center and add melted butter, vanilla essence, vinegar. Mix well.
Add boiling water little by little and keep mixing till you get a cake batter like consistency. You might not need the entire quantity of water.
Pour the batter till 3/4 into the cupcake liners and bake for 20 minutes or till a toothpick inserted in the middle comes out clean
Allow to cool.
With the help of a knife make holes in the cupcake and fill them with chocolate ganache which can be made by melting chocolate on a double boiler and adding cream to it and mixing it well. 


Decorate with some chocolate whipped cream and chocolate rice. 


Wishing all our readers a very Happy and joyous Diwali. May the festival of light bring you luck, prosperity and happiness.


Happy Diwali
Amrita

Wednesday, 27 August 2014

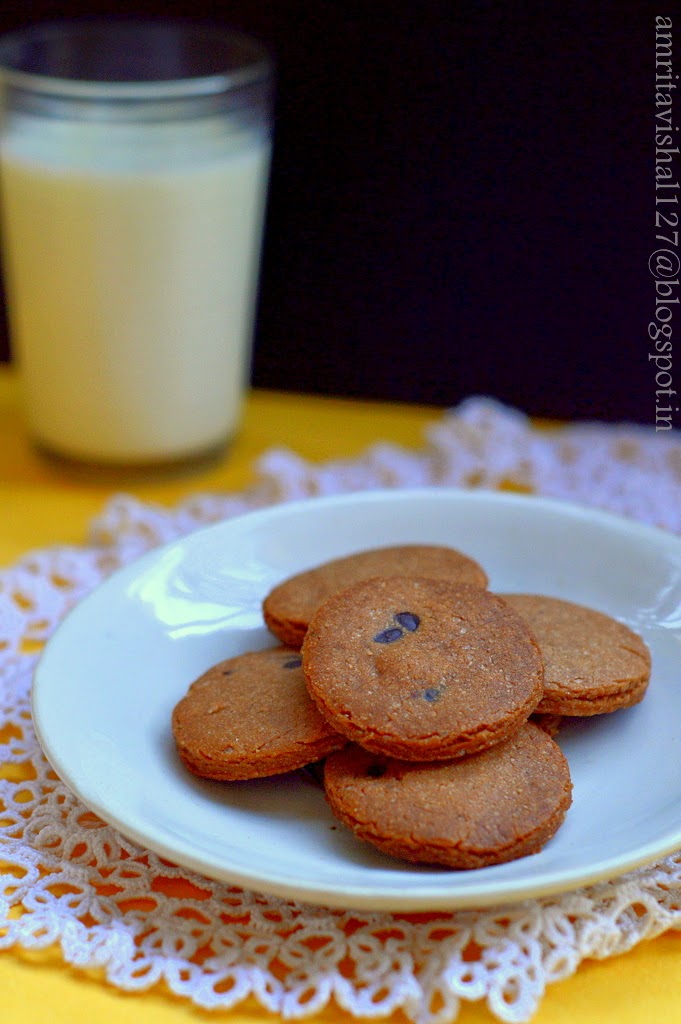
Cookie glass & some choco-chip cookies


Every now and then I am on a break from our blog. I guess with everything that you are passionate about there comes a time when you want to take a break.. relax..take a backseat and just wait for the right moment to get back on your feet and start again....that is if you are still passionate about it. 
Thankfully my passion to cook and click is still alive and hence here I am sharing a little overdued 'Sweet day' post. 
Choco chip cookies is not something new to the world of baking. In fact they were invented accidentally by Ruth Graves Wakefield of Toll House Inn who replaced baker's chocolate with chopped pieces of semisweet chocolate bar from Nestle which did not melt and only softened giving birth to the famous Chocochip cookies.
As famous as the chocochip cookies itself is its pairing with a glass of milk. There is certainly something about dunking your cookie in a glass of milk and eating it which is loved by all. 
Recently I chanced upon the Cronut Guru Dominique Ansel's newest invention-The Cookie shots where he has given a new dimension to the timeless pairing of cookies and milk. He made cookies shaped in glasses which can hold the milk and therefore you can drink your milk and eat your cookie at the same time. The cookie shots are lined with a layer of melted chocolate to avoid the milk seeping in the cookie and breaking it. 
I decided to try them at home but struggled with any pan of that shape. Found on the net about using stainless steel for baking and chose some glasses for my experiment which turned out pretty good. Stainless steel can get very very hot and hence you need to be very very careful while dealing with it for baking. Another important thing is greasing the glasses really really well. I regretted not trying one batch by lining the glass with butter paper/parchment paper. I overbaked one batch and had the toughest time of my life trying to get the cookie out from the glass. Well, it finally crumbled and came out a mess. Thankfully one cookie glass came out good enough for my experiment and I loved pouring my milk into it and enjoyed the experience of having my milk in a cookie glass! 
This sweet recipe definitely had to be on my Sweet day recipe list. Vaanya, my daughter enjoyed the cookies more than the cookie glass. I guess the traditional did beat the modern here. 


Recipe : Adapted from here 

Ingredients : Yields about 15 small cookies (2" round) and 2 cookie glasses (3" height)
  • 1/2 cup butter, room temperature
  • 3 tbsp sugar, powdered
  • 4 tbsp brown sugar, powdered
  • 1/4 tsp baking powder
  • 1 1/4 cup all purpose flour
  • 1 tbsp cocoa powder
  • 1/4 tsp salt
  • 1/4 cup choco-chips
  • 1/4 cup melted dark chocolate


Procedure : 
Take butter and both sugars in a bowl and whisk till light and fluffy.
Add all purpose flour, cocoa powder, baking powder and salt and knead to a smooth dough.
Knead in the choco chips. 
Refrigerate the dough wrapped in cling film for 30 minutes. 
Preheat the oven to 180 degree Celsius.
Take Stainless steel glasses and brush inside with butter liberally. Take little portions of the dough and press against the steel glass and smoothen it. 
Refrigerate the glass for 15 minutes for the dough to set.


Roll the leftover dough to 1/4 " thickness and cut out round shapes with a cutter. 
Place them on an aluminium lined baking tray. 


Bake the cookies for 10 minutes and allow them to cool.
Put the steel glasses in the oven and bake for 15-17 minutes.
Allow to cool completely as the steel glass will be very hot.
When completely cool tap the cookie glass out of the stainless steel glass. 
Coat the inside with melted chocolate and let it dry.


Pour milk in the cookie glasses and serve. 
Enjoy a sip from the cookie glass and take a bite from the cookie glass or just enjoy the choco chip cookies classic style by dunking them in a glass of milk.


Notes:
  • You can use deep muffin pans to make the cookie glasses instead of the stainless steel glass
  • Melted white chocolate can also be used to coat the inside of the cookie glass
  • You may omit the cocoa powder in the dough for the more classic Choco-chip cookies

Happy Chocochip cookies devouring
Amrita

Friday, 23 May 2014

Surprise Mickey Mouse cupcakes


Oh Toodles!
Vaanya, my bundle of joy, my angel, turns three today!
It was on this very day that our family was blessed with her. I can vividly remember her pretty pink face and her tiny cherub fingers and toes which made me wonder how did God create such a beauty. With time she grew all the more adorable and has filled our lives with unaccountable happiness and joy. 
This entire month has been all about mickey mouse because it is Vaanya's current fascination. With a mickey toy tucked in her arm she loves to sing and dance to the Mickey mouse clubhouse tune. So naturally, Mickey mouse had to be the  theme for her birthday celebration. 
With her birthday falling in the Summer vacations, it was decided to celebrate it with family in Allahabad and Lucknow. It has been so much fun to see the entire family gearing up to the theme with everyone putting in their ideas and inputs. From invitation cards to the cake, decorations to gift bags it is going to be all about Mickey mouse clubhouse.  
While I was doing my bit of research on the theme, I found these very attractive Mickey mouse cupcakes here. The surprise element in the cupcake with a mickey mouse inside it was fascinating enough to attempt. Though mine did not come out as neat as in the original, it was so much in the spirit of the birthday theme. The free download printables-mickey mouse cupcake wrappers and toppers have made them look all the more adorable. 
More about the birthday celebration in another post. 


Ingredients : For 5 cupcakes

Vanilla part:
  • 1 egg
  • 1/2 cup all purpose flour
  • 1/2 cup powdered sugar
  • 1/2 tsp baking powder
  • 40 gms butter, room temperature (I used Amul)
  • 1/4 tsp vanilla essence
Chocolate part: to make the inside mickey mouse
  • 1 egg
  • 3/4 cup all purpose flour
  • 1/2 cup powdered sugar
  • 1/4 cup +2 tbsp cocoa powder
  • 1/4 tsp baking powder
  • 1/4 tsp instant coffee powder (I used Bru)
  • 40 gms butter
Chocolate ganache icing:
  • 1/2 cup grated dark chocolate
  • 1/2 cup cream (I used Amul)


 Procedure : 

Mickey mouse chocolate part:
Preheat oven to 180 degree Celsius.
Prepare a small baking pan by greasing and flouring it. 
Melt butter in a pan over low heat. Add sugar and mix well.
Remove from heat and allow to cool.
Add egg and mix well.
Sift flour with cocoa powder, coffee powder and baking powder.
Add this to the butter mixture and mix well. 
Pour batter in the prepared pan and bake for 20-25 minutes or till a toothpick inserted in the middle comes out clean.
Allow to cool completely and keep aside for further use.

Vanilla part : 
Preheat oven to 180 degree Celsius.
Prepare cupcake tins by lining them with cupcake liners or just grease and flour them.
Take butter and sugar in a bowl and beat it well it it turns pale and creamy.
Add egg and beat well.
Sift flour with baking powder and mix with the butter mixture. Add vanilla essence and mix. 

Assembly : 
Take half of the prepared chocolate part and crumble it well. (Enjoy the other half with a cup of tea/coffee)
Mix 1 tbsp of the vanilla part with it along with 2 tbsp water.
Ensure that the mixture is of the consistency of a dough. 
Spoon a tbsp of the vanilla part in the prepared cupcake tins.
Now make a small round shape with the chocolate mixture and place it int eh middle, over the vanilla part.
Repeat for all 5 tins.
Make a 2" long cylinder with the chocolate part, join the ends and make it into a circle and place it over the round shape. Repeat the same for remaining tins. 
Top the tins with equal quantity of the vanilla cake batter. 
For more details, please see the video here
Bake for 20-25 minutes or till a toothpick inserted in the middle comes out clean.
Allow to cool. 

Chocolate Ganache icing
Gently heat the cream in a pan over low heat.
Remove from heat and add the chopped chocolate, and stir well.
Allow to cool.
As it cools it will, thicken.
Fill this in a patry bag with a star nozzle fitted and pipe over the cupcakes.
Serve, and surprise.
You will be able to see a mickey mouse from any angle.


Oh Toodles!
Amrita

Friday, 16 May 2014

Coffee cupcakes-the best ever


I have been having this utter coffee craving for a few days. I have unsuccessfully in the past attempted to pair coffee in my bakes where the quantity of coffee was not enough to bring in the required flavour. Since then I have been wanting to experiment with the quantities and find that perfect coffee cake. 
Fortunately I get such crazy experimental opportunities on my vacation. So after the amazing and very satisfying Swiss Black Forest cake experiment, it was time to conquer the coffee devil. 
I used my time and tested, always a winner, butter cake recipe and added a good quantity of dissolved coffee and a little cocoa powder. This tip was inspired by a dear friend Sarani who loves to add coffee to her chocolate cakes to intensify the flavour. I used the reverse and added some cocoa powder to balance the coffee flavour. 
As critical as I am about my own bakes, I was mighty surprised at the perfect balance of flavours and that hit of coffee in the cupcake. This definitely is a keeper recipe for me and was enjoyed thoroughly by my little daughter (apart from everyone else)


Ingredients : For 5 medium sized cupcakes
  • 1/2 cup all purpose flour
  • 1/2 cup powdered sugar
  • 1 egg
  • 40 gms butter, at room temperature
  • 1/2 tsp baking powder
  • 1/2 tbsp cocoa powder
  • 1 tbsp coffee powder (I used Bru)
  • 1 tbsp hot water
For icing:
  • 1/4 cup whipped cream
  • 1/2 tbsp coffee powder
  • 1/2 tbsp hot water
  • melted dark chocolate
Procedure : 
Preheat oven to 180 degree Celsius.
Dissolve coffee powder in hot water and keep aside to cool till further use.
Take butter and sugar in a bowl and beat it till creamy. I used my muscle power. You may use an electric beater. 
Sift flour, cocoa powder and baking powder.
Add egg to the butter-sugar mixture and mix. 
Add the flour mixture and mix till incorporated well.
Now add in the cooled diluted coffee. Mix well. 
Line muffin tins with liners or grease and flour it.
Pour batter equally to 3/4 the quantity of the muffin tin and bake for 20-25 minutes or till a toothpick inserted in the middle comes out clean.
Allow to cool. 

Icing:
Dissolve coffee powder in hot water and allow to cool. Gently add to the whipped cream without mixing too much. For more on whipping cream read here.
Fill this in a piping bag fitted a star nozzle.
Pipe on the cupcakes.
Take melted chocolate (cooled) in another piping bag or a plastic cone and snip off the end to make a very small hole. 
Pipe random lines on the whipped cream. 
I also made some rough hand motifs with chocolate on  a tracing paper and allowed it to cool for 4-5 minutes. Then peeled them off and put on the cupcakes for decoration. 


Notes : 
  • You may enjoy the cupcake without the icing on top. 
  • If using a stronger coffee, reduce the quantity as it will make the cupcakes bitter. 
  • You can make a coffee cake with the same recipe doubled. Here is one I tried.

Happy Coffee Indulgence
Amrita 

Wednesday, 14 May 2014

Swiss Blackforest cake


So I am back to Baking!
I have been literally struggling to find some time off my schedule to try some new bakes and have finally found so by coming to Allahabad for a month long vacation! It has just been a few days and I along with  Vaanya are having a whale of time running around our palatial house. Vaanya is getting far too much exercises just by walking around the house, a luxury which we do not have in our small den in Kolkata. With a beautiful front lawn and an equally big aangan, she surely is making the most of it. 
While she catches up some rest by sleeping late till morning, I sneak up to the kitchen to whip up a bake! The joy of baking is undescribable in words and can be only understood by equal enthusiasts. I save all kinds of elaborate experiments for this trip and thus finally found the opportunity to put my hands on a on-my-list for a long time - Swiss Black Forest cake. 
A classic and one of the most loved cake, this one turned out far easier and impressive than expected. The original cake recipe obviously calls for fresh cherries and some alcohol in the syrup but I have used easily available candied cherries and a simple jam-dissolved-in-water syrup inspired by my dear friend Kamalika. 
The cake recipe worked wonders and the cake rose up like a dream filling the kitchen with that irresistible smell of a fresh bake.


Recipe source : Cake recipe inspired by Deeba Rajpal who blogs from Passionate about baking.
 
Ingredients :

For the cake : Makes a 9" round cake to serve 8-10
  • 6 eggs
  • 1+1/4 cup powdered sugar
  • 1 cup all purpose flour
  • 3 tbsp cocoa powder
  • 2 tbsp cornflour
  • 1 tsp baking powder
  • 1/2 tsp vanilla essence
  • a pinch of salt
Syrup : 
  • 2 tbsp mixed fruit jam dissolved in little water

For Garnish:
  • 1 1/2 cup non-dairy whipping cream
  • candied cherries
  • grated dark chocolate
 
Procedure
 
Cake : 
Preheat oven to 180 degree Celsius.
Grease and flour a 9" springform pan or a normal round pan.
Sift all purpose flour, baking powder, cocoa powder, cornflour and salt.
Take eggs and sugar in a bowl and beat till triples in volume. This will require an electric beater and will take about 10 minutes. Add vanilla essence and beat again.
Gently fold in the flour mixture into the eggs with light hands so that the air incorporated in the eggs do not escape. 
Pour batter in prepared pan and bake for 30-35 minutes or till a toothpick inserted in the middle comes out clean. 
Allow to cool and slice in 2 equal layers.
 

Whip cream:
Thaw the whipping cream by taking it out 1 hour before required to whip. 
Chill the beaters and the bowl. 
Whip with electric beater for about 5 minutes with 1 minute breaks. Gradually increase speed from low to high. 
Beat till the cream begins forming lines and has thickened enough. Be careful not to overbeat as the cream may curdle.
Refrigerate till required.

Assembly : 
Spread the syrup prepared with jam dissolved in water equally over the cake layers. 
Spread the whipped cream in between the cake layers and sandwich them. 
Spread the remaining cream all over the cake.
Decorate sides with pressing the grated dark chocolate to the sides. Sprinkle some on top too.
Fill an icing bag fitted with star nozzle with some cream and pipe along the edges and one in the middle.
Decorate with candied cherries. 


Notes :  
  • Slice the cake in layers as soon as it cools enough to touch as the cake will get too crumbly if you allow to cool further.
  • With no butter or oil, this cake is a little dry so be careful to sprinkle enough syrup if you like your Black forest moist like me.
Happy Baking
Amrita

Friday, 24 January 2014

The Wicked Triple Chocolate pudding


24th of each month is a reminder to us to be thankful for the wonderful presence of our loving daughter Vaanya. Today has been 2 years and 8 months of the most beautiful and happy days of our lives. Vaanya continues to bring love, warmth and sunshine to our lives in the most uninhibited way. As parents, we are growing everyday, learning the simple lessons of life like unconditional love and care. Vaanya has taught us tremendous patience and has made us stop and enjoy small moments of life which we would otherwise miss in our fast paced professional lives.
Vaanya has started Montessori and has overcome the stage of crying and reached a stage of reluctance where everyday she tries to think of a new excuse not go to school. On her holidays, I feel more happy to have my little pumpkin catch a little more sleep and enjoy a bit more of the careless life she is used to. Sooner or later, I will have to let her go to face the world. I have to let her make new friends and have a world of her own. 
That reminds me about the amazing set of friends I have found in Kolkata Food Bloggers, a group that was started 1 year back by the most humble and talented person I know, Kamalika Chakrabarty. We have got together to celebrate KFB's first birthday by sharing finger food or desserts on our FB page. This recipe is dedicated to the most down to earth and immensely talented group that I am proudly a part of. Check out more amazing recipes shared on the birthday bash here.
Coming back to today's recipe, this was attempted when I was holidaying in Allahabad. Vishal joined us for the new year and we celebrated it in the most beautiful way with family over a Barbeque dinner. Vishal made the most yummy Chicken tandoori kebabs and Kakori kebabs which got polished in no time. The Barbeque was such a hit that it was repeated soon after a few day for Kushal (Vishal's younger brother) and his friends. This dessert was attempted for that party and turned out to be a unanimous winner and so wicked that it made one of Kushal's friend (who was on a strict diet)  give up his rigorous schedule and plunge right through it, making me have a devilish smile.    


Ingredients : For 4-5 servings

Chocolate Cake layer:
  • 1 cup sugar, powdered
  • 1 cup all purpose flour
  • 1/4 cup + 2 tbsp cocoa powder
  • 3/4 tsp baking powder
  • 3/4 tsp baking soda 
  • 1/4 tsp salt
  • 1 egg
  • 1/2 cup milk
  • 1/4 cup vegetable oil
  • 1/2 cup boiling water
Dark Chocolate cream layer:
  • 1 cup whipped cream
  • 75 gm dark chocolate, chopped
  • 1 tsp gelatin, powdered
  • 2 tbsp cold water
  • 1/4 cup milk
White Chocolate cream layer:
  • 1 cup whipped cream
  • 75 gm white chocolate, chopped
  • 1 tsp gelatin, powdered
  • 2 tbsp cold water
  • 1/4 cup milk


Procedure

Chocolate Cake layer:
Preheat oven to 180 degree Celsius. 
Grease and line a 9" round baking tin.
Take a bowl and mix sugar, flour, cocoa powder, baking powder, baking soda and salt.
Add eggs, milk and oil. 
Mix well so all the ingredients are incorporated well. Stir in boiling water (do not worry about lumps) The batter will be quite thin. 
Pour the batter in the prepared tin.
Bake for 35-40 mins or till a toothpick inserted in the middle comes out clean.
Cool the cake on a rack.
Cut cake into desired shape to fit in the choice of serving bowl/glass. 
Moisten the cake layer with a mixture of 1 tbsp sugar and 1 tbsp cocoa powder dissolved in 1/4 cup warm milk(Optional step)
I served the dessert in small glasses and so cut rounds of cake and fitted in the glass as the bottom layer. 
Dark Chocolate cream layer:
Take cold water in a small bowl and sprinkle gelatin over it.
Allow it to bloom and become spongy for 5-10 mins. 
Heat milk to a simmer and add chopped chocolate.
Remove from heat and stir well to dissolve the chocolate.
Add gelatin to the milk-chocolate mixture and mix well to dissolve it. 
Take whipped cream in a wide bowl and gently fold in the milk-chocolate-gelatin mixture.
Spoon the mixture on the chocolate cake layer in the glasses and refrigerate for an hour. 

White Chocolate cream layer:
Follow the same steps as above.
Spoon the white chocolate cream mixture over the dark chocolate cream layer in the glasses and allow to refrigerate for another hour to set. 

Sprinkle some grated dark chocolate over the dessert before serving.


Notes
  • You will have some cake bits left which can be eaten as it is or assembled with leftover cream.
  • You can also make alternate layers of the cake with white chocolate cream for an easier version.
Happy Wicked Indulgence
Amrita

LinkWithin

Related Posts Plugin for WordPress, Blogger...