Showing posts with label Pista. Show all posts

Thursday, 27 August 2015

Chocolate Salami


Raksha Bandhan or Rakhi has been a fairly simple festival in my house while I was growing. Being Sikhs, we have adapted a lot of our customs from Hinduism and therefore we celebrate a simplified version of it which means no tilak and Pooja. I remember seeing my Aunt perform the morning fast before tying the sacred thread on my Father and Uncle's wrist but as children we never had to do that. As children, I would tease my younger brother that being a girl is so lucky as you get 2 gifts in a year, one on birthday and another on Rakhi. At home, Mom would make some bread rolls for breakfast and thus our Rakhi would be over with some sweets. 
This year, Vaanya, my daughter will get to tie a Rakhi on my nephew. I see a part of my childhood in her and am looking forward to see her enjoy the day with her little brother. She is naturally too small to understand the importance of Rakhi but I am sure with time she will cherish these moments just like me. 
This year I wanted to try a rather very simple sweet. Something which does not require much work and is done in a jiffy. Therefore I decided to play with these Chocolate Salami where there is no definite recipe and you can add just about anything that you want. 
Chocolate Salami or Salame di cioccolata or Salame de chocolate is a traditional Italian and Portuguese dessert which is made from dark chocolate, broken bits of biscuits or cookies, butter, eggs and alcohol like rum or port wine.
A misleading name, Chocolate Salami is named because of its appearance where the dessert is shaped like a log and is cut in roundels while serving.
I skipped the eggs and got an intensely rich, rum laden chocolatey goodness in this dessert. For a children's version I used milk chocolate and skipped the nuts and fruits. Instead I added some cake pieces, biscuits of my daughter's choice and some almond powder. 
This dessert has endless variations. Go ahead and enjoy making and relishing it this festive season.


Ingredients : Makes around 7-8 slices of the chocolate salami
  • 200 gms dark chocolate, chopped
  • 1/4 cup cream(I used Amul)
  • 2 tbsp butter
  • 3-4 pieces of Marie biscuits or any digestive biscuits
  • 1/2 cup of assorted nuts and dried fruits(I used almonds, walnuts, cashews, pista and cranberries)
  • 2-3 tbsp rum (optional, may be substituted with orange juice)
Procedure : 
Dry roast the nuts and chop them fine. Mix with the chopped cranberries and keep aside.
Roughly break the biscuits in medium sized chunks and keep aside.
Heat cream in a pan. Be careful not to burn it.
Remove from heat and add the chopped chocolate to it. Mix it well so that the chocolate melts.
Now add the butter and mix. 
Throw in the nuts and biscuits and give it a stir. 
Allow this mixture to cool and thicken for around 4-5 minutes, or more if required.
Put this, now thickened mixture, onto a cling wrap and give it a log shape. Twist both the ends to secure it.
Pop it in the refrigerator for 3-4 hrs. 
In between take it out and roll it to maintain the shape.
Slice it and serve.

Note : For a children's version I used milk chocolate instead of dark one and added digestive biscuits, chocolate biscuits, cake pieces. I also added 1 tbsp of almond powder instead of the chopped nuts. And yes, the rum has been omitted there. 


Happy Raksha Bandhan
Amrita

Saturday, 11 July 2015

Mango Phirni


I strongly believe in food being very inspirational. A sudden thought, a casual discussion, an image or even a remote one-word talk of food can really inspire us. It does to me, atleast. 
This recipe is purely an attempt because of the inspiration I got from my husbands casual visit with his friend who were catching up to devour some Eid delicacies. Vishal called me up to find out if I am interested to cook mutton as he was close to a meat shop waiting to relish on some Phirni. It was just this one word 'Phirni' that kept rolling in my head and for who's sake I refused to hear the word meat too. I kept the phone down and went on thinking of that sweet, earthy smelling, milky thick goodness that my husband and his friend were digging into. I refrained from calling him again and demanding my bowl of the heavenly sweet and thus decided to make my own. This silly little incident, you see, made me wake up from my lazy self and churn up this sweet delicacy. 
Since we still have mangoes lingering all around us, I decided to try a Mango phirni version making it all the more irresistible. I took my mothers help who shared her recipe of this rather simple, quite a cousin of kheer sweet. I fetched these typical earthen bowls meant specially to set Phirni which is easily available in the local markets. This gives that earthy beautiful aroma to the phirni. In case one does not get them, set your phirni in any normal bowl. 
The mango version was quite loved by my Sweet guru-my father who has an unmatched authority over everything sweet. But one bite into that earthy smelling, elaichi flavoured yummy normal Phirni satisfied my craving finally. 
Flavoured or simple, this recipe is super simple and a must if you have never tried. 


Ingredients : Serves 8-10
  • 1 litre full fat milk
  • 3tbsp rice (I used gobindabhog. You can use Basmati too)
  • 3-4 tbsp sugar (depending on your taste)
  • mango pulp from 1 mango, strained
  • almonds, pista, chopped mango for garnishing
Procedure : 
Soak rice in water for half an hour.
Take milk in a heavy bottomed pan and let it come to a boil. Simmer and cook on low heat.
Meanwhile grind the soaked rice in a mixer. It will not become fine so a little coarse is alright. 
Add the ground rice to the milk and stir continuously. 
Slowly you will observe that the milk has thickened.
Add sugar to your liking and cook till it reaches the required thickness to set. 
This is the normal Phirni which can be set at this stage in bowls. Refrigerate and garnish with almonds, pista and elaichi powder.


For mango Phirni, once the thickened milk has cooled a little, add the mango pulp little by little and use as much as required. Too much addition will dilute the phirni consistency. In that case reduce it again on low heat. 
Set this in bowls and refrigerate. Garnish with chopped mango and pista. 


Happy Phirni Indulgence
Amrita

Wednesday, 4 March 2015

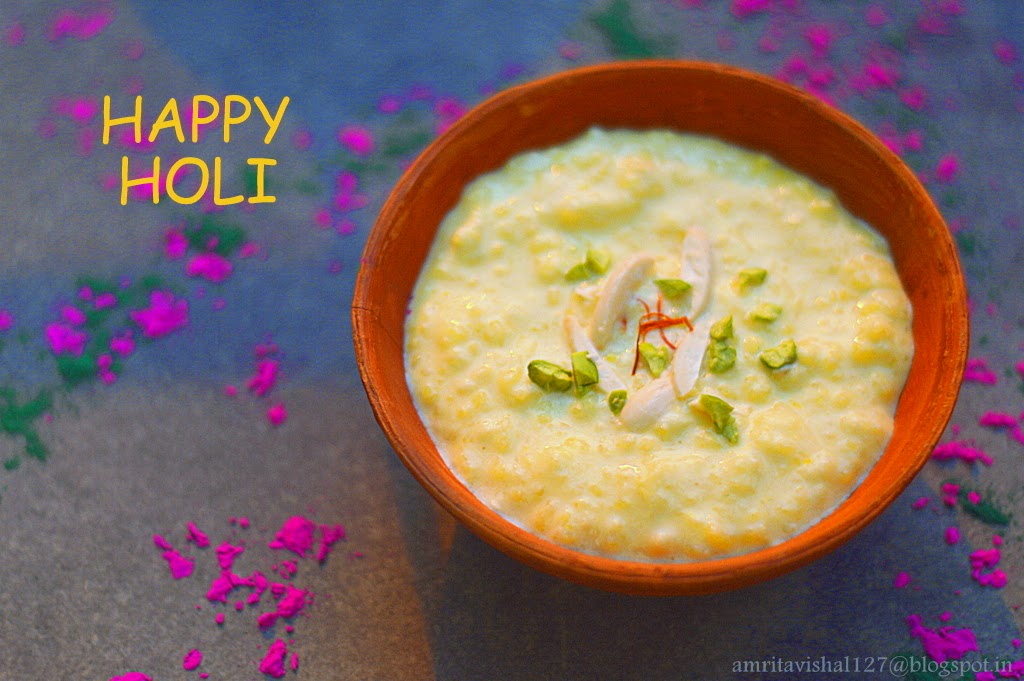
Kesari Kheer


Desserts have always been a part of our daily meals when I was growing up, especially the milk based ones. Being a Sikh, milk has always been present in surplus in our house. I have memories of going along with my Grandmother, my Beji, to the milkman or gwala who would milk the buffaloes in front of us and give us fresh milk. From drinking milk as it is to using it in endless desserts, Beji would ensure her family is fed well with milk along with other things. I guess, there is just some connection with milk and being a Punjabi
Kheer is one of the most common milk based desserts found in most households irrespective of the region. Known with different names, the simple preparation of rice cooked in milk is called payesh in Bengal and is called payasam in the Southern states. Adorned with dry fruits and saffron threads, a simple kheer is made special for occasions. 
With Holi round the corner, I was reminded of this simple kheer preparation that has been part of my growing years. 

Ingredients : For 3-4 servings
  • 500 ml full cream milk
  • 1/2 cup rice (I used Gobindbhog)
  • 1/2 cup or less sugar (according to your taste)
  • cardamom powder
  • saffron threads
  • almonds
  • pista
Procedure : 
Wash and soak rice for half an hour.
Take milk in a heavy bottomed vessel and bring it to a boil.
Add the washed and soaked rice to the milk.
Lower the heat and allow the milk and rice to cook for about 45 minutes or till it thickens to the required consistency. Keep stirring in between.
Meanwhile soak saffron threads in little warm milk. 
Add sugar to the milk-rice mixture and mix well. Adjust sugar to your liking.
Adding sugar will make your kheer a little thin so cook till it thickens again. 
Remove from heat and stir in the saffron threads and cardamom powder.
Allow to cool and garnish with chopped almonds and pista. 
Serve chilled. 


Happy Holi
Amrita

Thursday, 24 April 2014

Fig tarts with pista crumble


24th of the month and it is time for our 'Sweet day' celebration. 
For those who do not know, every 24th I share a sweet creation to celebrate the birth of the little angel in our lives, our munchkin, our daughter Vaanya.
Next month Vaanya will turn 3 years old and we will have a grand family get together in Allahabad.
I love baking with fruits and look forward to seasonal ones to experiment. Having not much opportunity to find figs here in Kolkata, once I did I jumped onto trying 2-3 recipes with it which have been in the folder since months. 
This recipe was first viewed on Masterchef Australia where Gary Mehigan took a masterclass. The combination of pista with fresh figs intrigued me a lot and I was happy to finally out my hands on it. 
As usual I have reduced the recipe to suit our small family. I have modified the procedure to my ease and have used my tried and tested tart shell recipe. 


Recipe from : Adapted from Masterchef Australia

Ingredients : I reduced the recipe to get two 3" tarts 

Shortcrust pastry for tart shells:
  • 1/4 cup all purpose flour
  • 2 tbsp cold butter
  • 1 tbsp powdered sugar
  • cold water for kneading
Pista Crumble :  
  • 5-6 blanched, peeled and finely chopped pista
  • 1 tbsp sugar
  • 1 tbsp all purpose flour
  • 1/2 tbsp chilled butter
Frangipane filling :
  • 2 tbsp unsalted butter, room temperature
  • 2 tbsp sugar
  • 1 small egg
  • 1/4 tsp zest of a lemon
  • 1/4 cup all purpose flour
  • 15 blanched and peeled almonds
  • 20 blanched and peeled pistachios
  • 2 tbsp honey
Garnish : 
  • 1 fig, slices/wedges
  • chopped pista
 

 Procedure

Shortcrust pastry :
Take flour and butter in a bowl and rub the butter cubes with the flour till the mixture resembles breadcrumbs (in texture).
Now add cold water 1 tbsp at a time and knead to get a smooth dough. Do not over knead.
Wrap this dough in a plastic sheet and refrigerate for half an hour.
Take out the dough and roll it with a rolling pin on a floured surface. Roll it roughly to the size of the chosen tart tin with 1/8" thickness.
Gently press the dough down so that it lines the bottom and sides of the tart tin. Trim excess dough.
Line all the tart tins the same way. Make holes on the sides and bottom with a fork and refrigerate for another half an hour.
Preheat the oven to 180 degree Celsius. Bake the tarts for 15-20 mins or till they get a light brown colour.
Take them out and let them cool.
For a detailed step by step illustration refer here

Pista Crumble : 
Take a bowl and mix pista, sugar and flour. Rub butter into this mixture. Leave small lumps of butter in it. Keep aside.

Frangipane Filling :
Grind almonds and pistachios with honey till you get a fine paste. 
Preheat oven to 160 degree Celsius. 
Whisk butter and sugar in a bowl till creamy. 
Add egg, lemon zest, flour and almond-pista paste. Mix well. 
Spoon the mixture in the prepared tart shells till 3/4 full. 
Sprinkle the pista crumble on it.
Press in the fig slices/wedges. 
Bake for 20-25 minutes or till the top browns a little. 
Allow to cool.
Sprinkle chopped pista on top and serve.


Happy Fig tart enjoying
Amrita

Wednesday, 30 October 2013

Besan aur Sattu ki barfi


Kolkata Food Bloggers is a group that is enriched with not only some amazing food bloggers but moreover some really amazing people. One such person that enriches this group is Sarani Tarafder. A very beautiful person inside out, Sarani is an ex-banker by profession and has an amazing knack of taking wonderful pictures besides being a fabulous writer. She blogs from Cocawind and has a collection of some very easy and impressive dishes.
I personally got the opportunity to interact with her one to one on our Gourmet Indulgence in The Oberoi Grand, Kolkata experience and cherish each moment of the fun we had there. A very selfless and dedicated person, Sarani is a true example of 'A friend in need is a friend indeed'. 
With the festivity in the air, I naturally had no choice but to jump onto her Besan Ladoo recipe. It so reminded me of my childhood when mummy would fondly make all sweets at home. One of my favourite used to be these big Besan ladoo. I have tweaked the recipe and added some sattu to it and have followed my mother's tried and tested method of making it. Check out Sarani's very cute bite size Besan ladoo's adorned with almonds here


Ingredients : For 9 pieces of square shaped barfi
  • 1/4 cup besan/gram flour
  • 1/4 cup sattu
  • 1/4 cup sugar
  • 3/4 cup water
  • 1/4 cup ghee/clarified butter
  • 2-3 green cardamoms, powdered
  • 4-5 almonds, sliced
  • 4-5 pista, sliced
  • silver warq/edible silver sheets
Procedure :
Take a deep pan/kadhai and add ghee. Add besan and let it cook on low heat. Keep stirring constantly to avoid burning. After 2 minutes add sattu and cook both till the colour of besan and sattu changes to a deeper brown. 
Meanwhile  take sugar and water in another pan and get it to a rolling boil. Reduce heat and add cardamom powder. 
When the besan and sattu mixture gets cooked, add this sugar mixture to it and stir constantly till the mixture thickens on medium flame. 
Prepare a square tray by greasing it lightly.
Spread the mixture on it evenly. 
Allow to cool.
Sprinkle the sliced pista and almonds and gently press on the mixture.
Garnish further by pressing silver warq on it.
Cut in squares and serve.


Notes
  • You may substitute sattu with besan for a more authentic recipe which also will give you a little light coloured barfi. 
  • You may also try and use only sattu for an even more interesting variation. Remember not to cook sattu for too long in the ghee as it may brown early. 
  • You may shape them as balls when slightly cool instead of the barfi shape.
Happy Barfi eating
Amrita

Wednesday, 16 October 2013

Aataa diye Phool Sondesh/Custard Apple flavoured Flower Sandesh


Impulse!
A wish or urge, particularly a sudden one. Doing things in the spur of the moment.
A few days ago, on a very popular facebook foodie page, Chef at Large, a young girl, living in Mumbai, inquired if there was anyone from Kolkata who could make and deliver sweets to her parents, as a family tradition, on the auspicious occasion of Bijoya Dashami, which is the very last day of the popular festival in West Bengal, Durga Puja.
After I looked at her post, surprisingly, no one was able to help her out. 
I felt amused that in such a big metropolitan city, no one was able to offer help by making and delivering sweets to her parents which would really bring happiness and joy to both of them. 
On checking back the facebook page I saw the resignation on this young lady as she drew a sad smiley :( on her post. 
That was the moment when 'Impulse' got the better of me and I jumped, like a Daniel come to Judgement, to offer myself in the mission to make something and have it delivered to her parents.
I offered a range of cakes and cupcakes that I had baked many times over but she suggested preference to some Bengali traditional sweets over the bakes' series. The traditional Bengali sweets do not come under my domain and comfort zone and I wondered if I had bitten more than what I could chew by accepting her requisition. 
I made two samples out of which she chose the one with the rasagulla wrapped in rose petal shaped sandesh and flavoured in custard apple.     
It took me the whole day handcrafting these delicate sweets and help from literally everyone from my family. My mother very sweetly helped me in all the steps and most importantly kept my doting daughter, Vaanya, away from all this as she thought that the chenna was her play doh and wanted to play with it! It was 8:30 pm when I finally finished shaping all the petals. The basket was arranged by my mother and Masi and these delicate beauties were laid in Banana wrappers and into the basket. My husband drove me through a rainy and jam packed Puja night to deliver the baskets to the girls parents at 10:30 pm. 
The sheer surprise and the joy I saw on the faces of her parents made each second of my hard work worthwhile. There was a little lovely note from their daughter and I am sure they felt really proud of their doting daughter's gesture of keeping up the family tradition of offering sweets in Dashami.
It was a crazy day for me but the most memorable one as the incident not only brought joy to everyone around but also, through this divine intervention, kick started a long awaited desire to start a tiny business from home that has been on the cards, but procrastinated, for quite a while. 
This is my passion that now, through this incident, has ushered me into a new chapter and certainly this is what I would love to do for a living day in and day out.  


Ingredients : I made 50 pieces for the order. But here I am giving the proportion for 10 such pieces.
  • 1 litre milk
  • 1/4 tsp citric acid/1 tbsp lemon juice
  • 1 cup sugar
  • 3 cups water
  • 1 Custard apple/Aata(Bengali)/Shareefa(Hindi)
  • Food colours-yellow and raspberry red
  • Chopped Pistachio for garnishing

Procedure:

Rasagulla
Heat milk in a pan and let it come to a boil. Add citric acid/lemon juice and stir well. Soon you will see the milk curdling and whey separating. Wait till the whey separates well. Remove from heat and using a muslin cloth drain the chenna(curdled milk) from whey. (Do not throw whey, reserve it for using to make soft chapati dough or make yummy dal/gravy.)
Hang the muslin cloth to drain excess water for half an hours. Remove and put on a plate. Cover with another plate and put a heavy object to drain any remaining liquid for about half an hour.
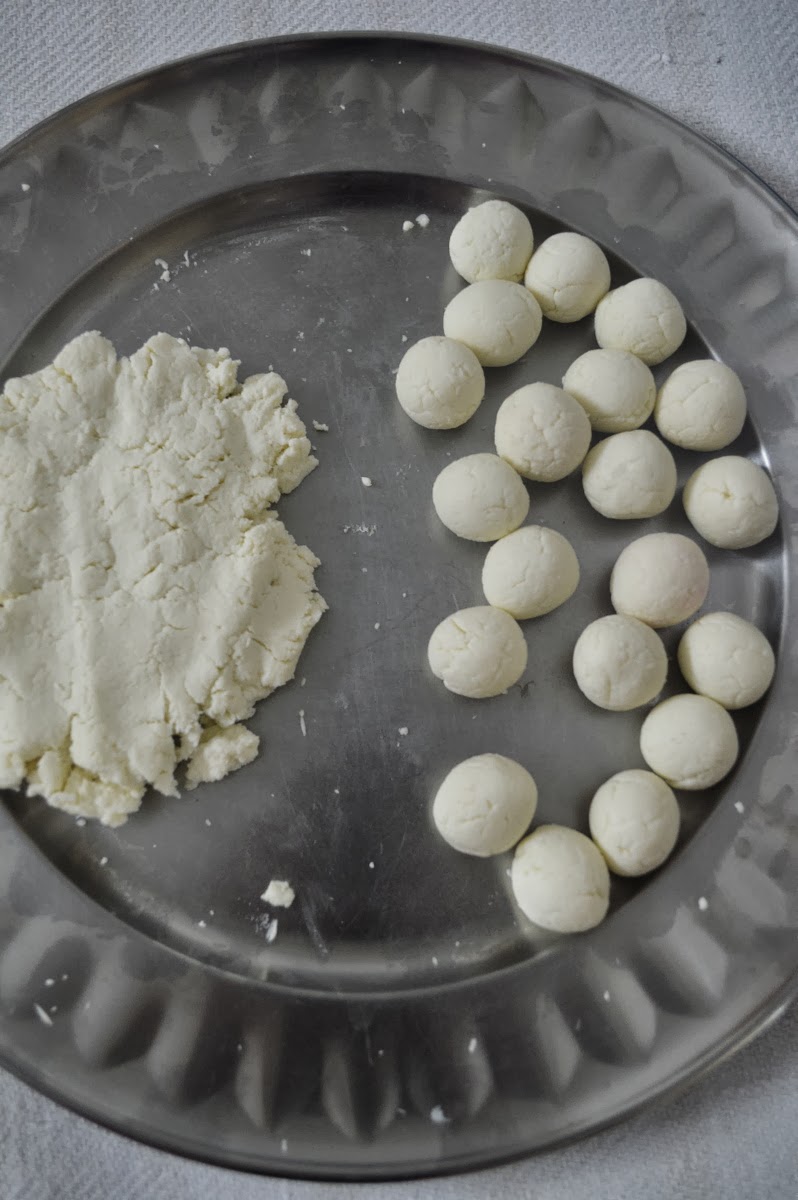
Take out the chenna and knead with the heel of your palm till smooth and reaches dough consistency. This requires patience and strong arm muscles and can take around 10 minutes.
Make 10 round shaped balls out of the kneaded chenna. 
These were made for the order and hence are more in number
Take sugar and water in a pressure cooker and let it come to a rolling boil. Lower the chenna balls in it very carefully and close the lid with the whistle on. Wait for 2-3 whistles on medium heat and then switch off the gas. Let the heat dissipate naturally.
Open lid and take out the soft spongy chenna balls or rasagullas from the syrup and keep aside to cool.


Custard Apple flavoured chenna
Peel the custard apple and put the pulpy part surrounding the seeds through a strainer. With the help of a spoon, mash it well to get the custard apple pulp. This again requires patience and time. Keep aside.
In a non stick pan, add the custard apple pulp and mix in some sugar(optional).
Add the kneaded chenna to it and on low flame keep stirring continuously to avoid burning the chenna.
The chenna will gradually change colour and will become lumpy. This should take 10-15 mins of continuous stirring.
This is called 'Makha' or 'Ready to be moulded' stage.
Remove from heat and allow to cool enough to handle with hands.


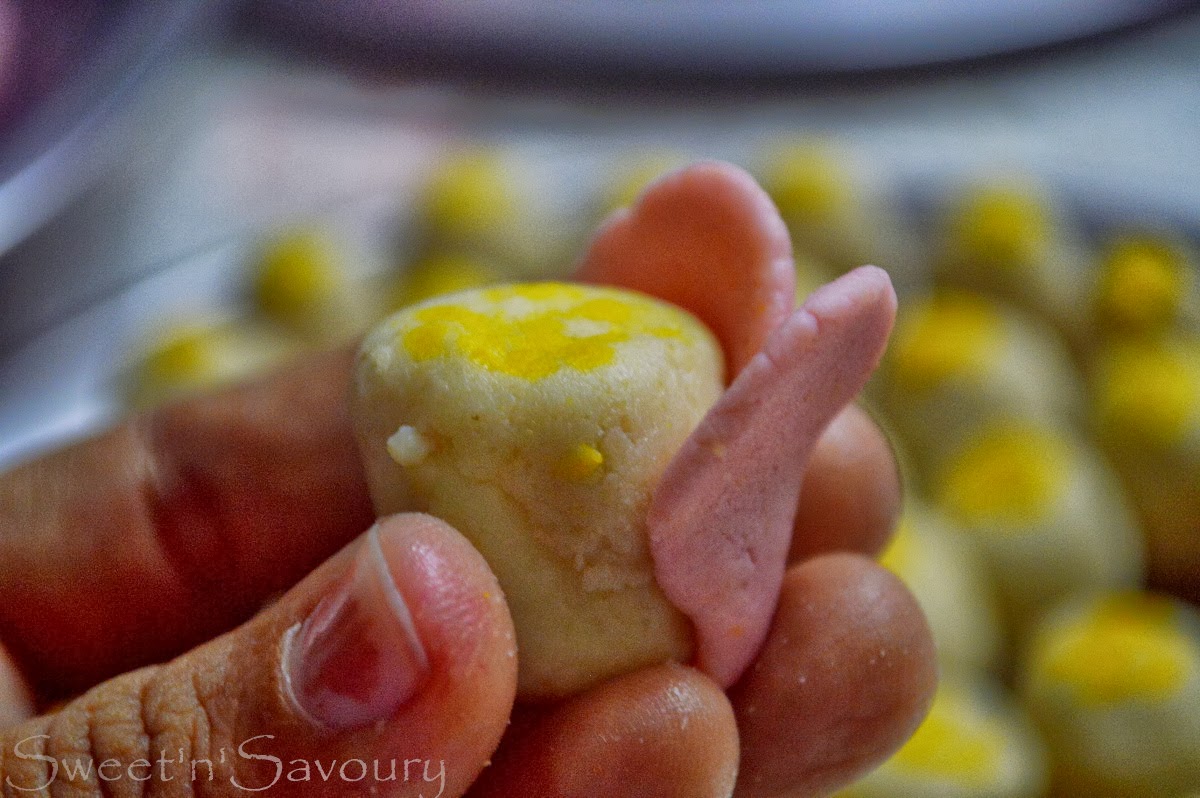
Take the rasagullas and cover them with the custard apple flavoured makha/cooked chenna. 
 
 
With a toothpick dipped in the yellow food colour, mark on top of the chenna wrapped rasagullas.


Add little raspberry red food colour to the remaining custard flavoured cooked chenna to get a baby pink colour. 
Take small balls out of it and shape them as petals.


Attach to the sides of the chenna wrapped rasagullas.


Arrange 5 such petals on the sides giving it the shape of a flower.

  
Garnish with chopped pista.


I made 50 such pieces and arranged them in a basket for my maiden venture.


Wishing all readers a Shubho Bijoya and Happy Dusshera
Amrita

Saturday, 5 October 2013

Malai Chamcham


It is such a great pleasure for me to introduce to you, in continuation to the series of 'Know Your Kolkata Food Blogger', a very special blogger who is as humble as her accomplishments are in the world of great food that she has been churning up for so many years. In fact, she has been in the sphere of blogging for so many years that she would need no introduction and chances are that you would have already known and read her blog. Sayantani Mahapatra, blogging from 'A Homemaker's Diary' is our blogger of the week and truly a dear friend who is always ready to lend a helping hand. She has been an inspiration to many and her works speaks volume of an in-depth understanding of food and cuisines. She has a keen interest in crafts and her home is a reflection of her amazing knack in interior decoration too. Always with a smile to adorn her kind face, Sayantani is one of the most humble people I have met. 
For this event, my recipe for recreation was chosen long back. I had been eyeing her Malai Chomchom and waiting for an excuse to attempt it. With Sayantani's recipe I am always ensured to come out with amazing outcomes. I modified the recipe and made it a little milky for our liking. You may check her version and her detailed and easy to follow instructions.


Ingredients: For around 15 pieces

Chamcham :
  • 1 1/2 litre milk (Ideally full fat or cow's milk, but I used Amul Taaza)
  • 1/2 tsp citric acid or 1 tbsp lemon juice
Sugar syrup :
  • 1 cup sugar
  • 3 cup water 
Malai syrup :
  • 2 cups milk
  • 3 tbsp condensed milk
Garnish 
  • chopped pista
  • saffron threads

 Procedure :

Chamcham 
Heat milk in a pan and let it come to a boil. Add citric acid/lemon juice and stir well. Soon you will see the milk curdling and whey separating. Wait till the whey separates well. Remove from heat and using a muslin cloth drain the chenna(curdled milk) from whey. (Do not throw whey, reserve it for using to make soft chapati dough or make yummy dal/gravy.)
Hang the muslin cloth to drain excess water for half an hours. Remove and put on a plate. Cover with another plate and put a heavy object to drain any remaining liquid for about half an hour.
Take out the chenna and knead with the heel of your palm till smooth and reaches dough consistency. This requires patience and strong arm muscles and can take around 10 minutes.
Make cylindrical shapes out of the kneaded chenna and keep aside. You may even make round shapes as in rasagullas.


Sugar syrup
Boil water and sugar in a wide pan and gently lower the chenna cylinders in it. 


Simmer on medium heat for around 15-20 mins or till they start floating on the surface.


Alternatively, take sugar and water in a pressure cooker and as the syrup comes to a rolling boil, lower the chenna cylinders. Put the lid on and cook on medium heat for 2 whistles. Allow the heat to dissipate naturally and take out the cooked chenna cylinders.

Malai syrup:
Take milk in a pan and let it simmer on medium heat till it reduces to half in quantity. This may take 10 mins. Now add the condensed milk in it and mix well. 
Remove from heat and transfer to a a wide bowl and soak the cooked chenna cylinders.


If you like a thicker consistency, let the milk reduce more before you add the condensed milk. 
Soak pista in warm water for 5 minutes and rub the skin to remove it. Chop pista.
Garnich with chopped pista and saffron threads.
I made a batch with the chenna shaped in rounds and soaked in the same syrup.

Happy Malai Chamcham Eating 
Amrita


LinkWithin

Related Posts Plugin for WordPress, Blogger...