Sunday 29 April 2012

Corn on the Cob in rich Onion sauce


I decided to try something different this time. Usually my cooking revolves around sea food, fish and chicken but there comes a time when you want to explore something outside your domain.

I got this recipe from a wonderful series from the OM and the HHI publishers called the 'Indian Cooking'. I highly recommend this series as they give amazing illustrations and techniques into the art of cooking.

We had some corn at home which were waiting for some justice to be done to them. I came across this simple recipe and thought it wouldn't be a bad idea to try it out.

Ingredients:
2 Corns
Vegetable oil for frying
1 large Onion, chopped
2 Garlic cloves, crushed
2 in fresh root ginger, crushed
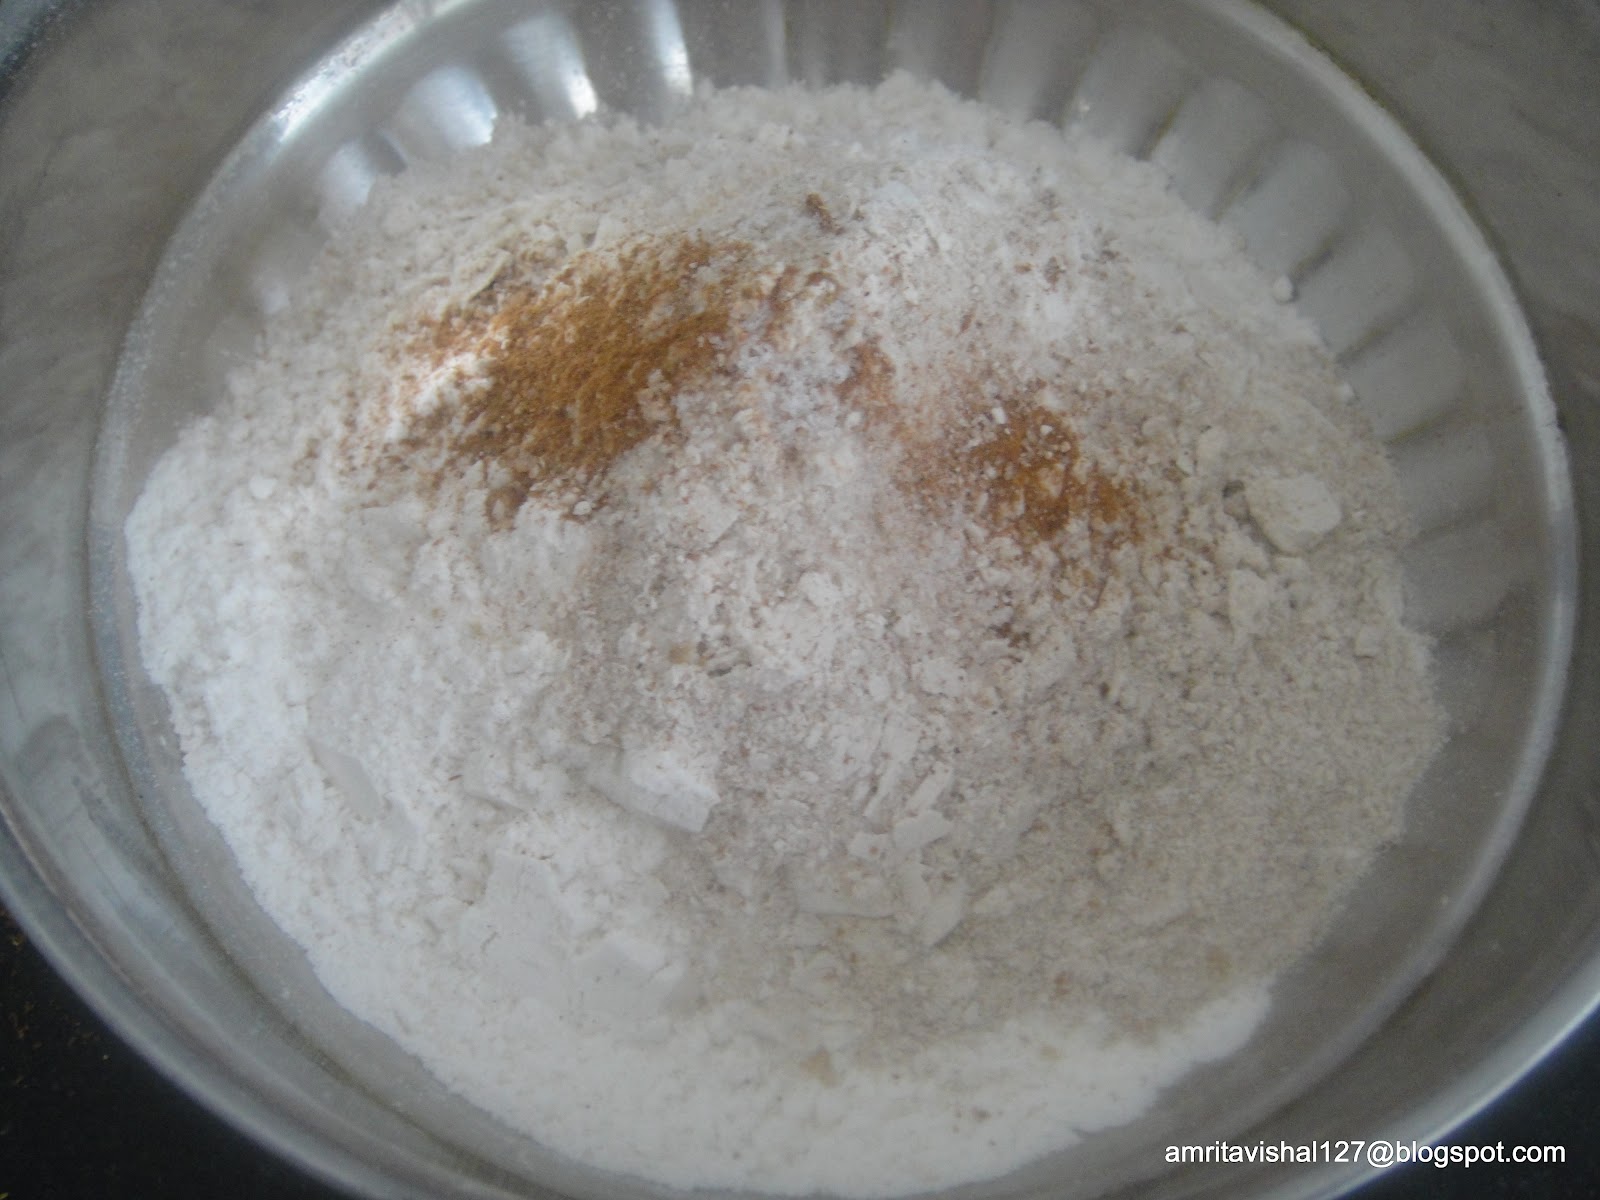
1/2 tsp ground turmeric
1/2 tsp onion seeds (kalounji in hindi , kalo jeeray in bengali)
1/2 tsp cumin seeds (jeera in hindi )
1/2 tsp chili powder
150 gms fresh yogurt
Salt to taste

Procedure:

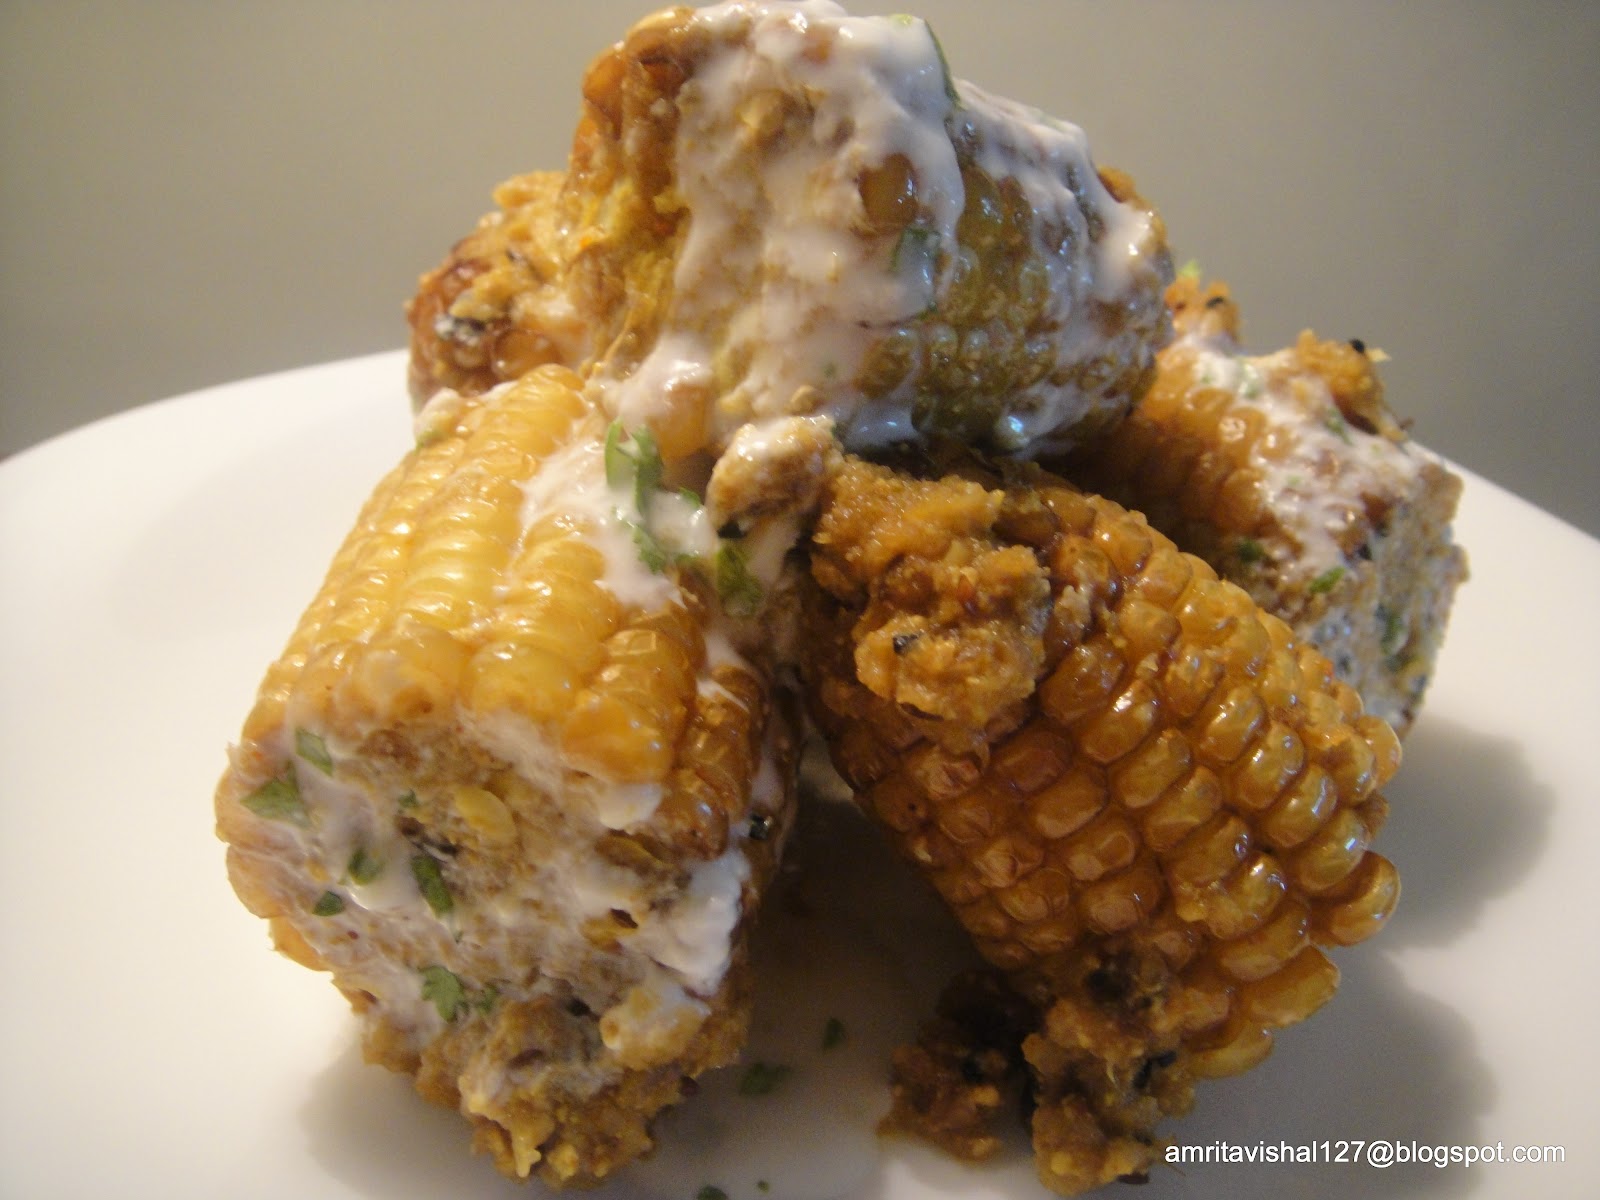
Cut the corn cobs into two using a heavy knife
Fry them in a wok or karahi until golden brown and set aside.
Remove excess oil.
In the grinder combine the onion, garlic and ginger and grind it to a paste.
Take 2 tbsp oil in a pan , add onion and cumin seeds.
Fry the onion paste mixture till they release their flavour.
Add the spices and cook until the spices have blended and the oil starts to separate
Lower the heat and add the yogurt, whisking them to make a consistent sauce.
Add salt to taste.
Pour on top of the corn.

Serve warm.

Note: I found that the baby corn could have been a better option. You may also use any other ingredient instead of corn.

The combination of the spices in the sauce were very amazing in this recipe. This sauce can be used in preparing any other dish.

Cheers

Vishal


Saturday 21 April 2012

Egg Pie


 What do you call a recipe that never falters, is super easy to make and comes out super yummy every single time. Recipes that you must have made over and over again and remember the entire procedure so well that you never need to go back to your recipe notes...???
 I simply call them  ''Works Out Everytime'' recipes.

Egg Pie for a long time has been our staple Sunday morning breakfast .When I got married , I learnt of Vishal's, love affair with eggs. Every morning when I asked him ''what will you eat ?'', his answer always was-''Eggs'' . He can have eggs boiled, poached, fried or at times even raw .
Once he called up his mother in Allahabad and said with excitement - ''Pata hai aaj breakfast mein kya khaya ?".
Poor Amma knew the answer very well but still tried to be a good sport and asked ''Kya khaya?''
Vishal gleamed and exclaimed-"Anda fry".
''Usme naya kya hai ?'' enquired Amma. 
Vishal replied-''Aaj ande ka yolk 20 degree left tha." !!
 
Well his 'egg for breakfast' fascination has now changed and he is more open to try out other options too. But this recipe still tops his list of egg recipes .


Ingredients : For 2 people
  • 2 eggs
  • 2  boiled potatoes(medium sized)
  • 1/4 of red,yellow and green capsicum (or 1 green capsicum if you don't want to use red and yellow)
  • 4-5 button mushrooms
  • 1 onion
  • 1 green chilly
  • 1 tbsp Olive oil 
  • Salt and Pepper to taste
  • 4-5 tbsp mozzarella cheese(grated)


Procedure :
Roughly chop the onion , capsicums , mushroom and green chilly. Take olive oil in a pan and saute the vegetables for 1 min with salt and pepper .(Do not overcook as the veggies will be baked later on)


Mash the boiled potatoes. 
Take eggs in a bowl and whisk them. Add salt to taste .
In a mixer, mix the eggs and the mashed potatoes until blended well.
Preheat oven to 200degree Celsius.
Now take an ovenproof bowl and put a layer of the veggies. 


Then pour the egg and potato mixture.  
Finally sprinkle grated mozzarella cheese on top.

 
Bake in the oven for 25-30 mins or till the cheese melts and becomes brownish To check if the eggs are done ,insert a toothpick and check if it comes out clean .


Serve with  a slice of toast and hot tea .

Happy Baking !!
Amrita

Saturday 14 April 2012

Spicy Mustard Prawns


This is one of my absolute favourite prawn preparation which, believe me, is actually very very simple to make. I love this as a starter, usually with drinks, but it can also be served as a side curry dish.

This dish was introduced to me by my very bubbly  sister-in-law Tina. Since then it has become almost like a religious custom in our family, devouring about 1-2 kgs of these amazing prawns at a time with drinks.

Chachaji often goes to the fish vendor and the question asked is 'How much prawn do you have?'
The reply comes like 'Do (Two) kg sahib. Kitna chahiye?'
'Sab de do' shoots Chachaji in a tone that says, even this is not enough.

The amazing balance between mustard, fresh curry leaves, garlic and chilli goes extremely well with the prawn. It is very simple to make and so enjoyable to relish.

Recipe Source:  My sister-in-law Gurveena'Tina'Gill (who makes the yummiest prawns)

Ingredients:
  • Prawns Large 500gms
  • Mustard Oil 3-4 tbsp
  • Mustard Seeds 1 tsp
  • Curry Leaves 15-20 leaves
  • Dry Red Chili  2
  • Garlic 4-5 cloves
  • Turmeric Powder (Haldi) 1 tsp
  • Salt to taste
Procedure:

Clean the prawns. De-shell and de-vein.
Marinate the prawns in haldi(turmeric) and salt and set it aside for about 15-20 min.

In a frying pan (kadhai) heat about 3-4 tbsp mustard oil and fry the prawns till they turn reddish/orangish colour. This should take 2-4 minutes.
(The prawns can be cooked in advance and set aside in refrigerator to be cooked later. The frying procedure also preserves the prawns longer and takes the fishy smell out. If refrigerated, bring the prawns back to room temperature before cooking)

In the meanwhile, break the dry red chili into two halves and de-seed them. Soak them in warm water for about 5 min. Roughly chop them and make a paste with the garlic cloves in a mortar and pestle .

In the frying pan heat about 1 tbsp mustard oil. Put  mustard seeds and then the curry leaves  for few seconds till they release their flavour. Stir in the garlic and chili paste and let them cook for few minutes. Stir in the prawns and cover for few minutes.

To make it into a curry, pour in about 1 1/2 Cups of water and let the gravy reduce to the consistency of your liking.

Serve hot with rice or eat them as a starter with drinks.


Cheers & Slurp

Vishal

Sunday 8 April 2012

Hot Cross Buns


Hot cross buns! Hot cross buns!
One a penny two a penny - Hot cross buns
If you have no daughters, give them to your sons
One a penny two a penny - Hot cross buns!
Until lately my only association to Hot Cross Buns has been this nursery rhyme  i heard  in my childhood.Recently i understood the significance and importance of Hot Cross Buns to Easter Celebration. 
Hot cross buns are sweet ,small, spicy buns made with raisins and decorated with a white cross on top traditionally eaten on Good Friday. The Buns with their combination of spicy, sweet and fruity flavours has long been an Easter tradition.
The cross on top of the buns symbolises and reminds Christians of the cross that Jesus was killed on.
The buns were traditionally eaten at breakfast time, hot from the oven. They were once sold by street vendors who sang a little song about them.
"Hot cross buns, Hot cross buns,
One a penny, two a penny,
Hot cross buns."

Thus it was a great occasion for me to try my baking skills . Let me confess that i have, till date, tried my hands on baking bread only twice. And without being too modest, let me confess that they came out very well.  Thanks to the wonderful blog called  Cakes And More! by Suma Rowjee (Do check her blog at sumarowjee@blogspot.com)She has been quite an inspiration to me at trying my hands on baking breads and her posts helped me to understand the importance of attaining good quality yeast before i start baking any bread. Good quality yeast is the first step to bake a bread successfully  There are three types of yeast available
  1. Active dried yeast- the most commonly available , the cheaper one and as i  understood the one that doesn't help the bread rise much.So not worth the try.
  2. Instant yeast - little expensive but totally worth it.This is the one i use in my breads,a brand called 4 seasons. You can also try Gloripan ,or any other instant yeast.
  3. Fresh yeast - short storage time and a little smelly
 Once you have your yeast , believe me baking a bread at home is so easy and very rewarding !!
Lets begin by baking these very easy and yummy hot cross buns .

Recipe Source : Adapted from  Joy of Baking

Ingredients : I halved the original recipe to get 6 buns

  • 1/2 cup milk
  • 1 tsp instant yeast
  • 1/2 tsp white sugar
  • 1 1/2 cup refined flour
  • 1/4 cup brown sugar (the original recipe says 1/4 cup for 12 buns ,therefore i halved the quantity but my buns were less sweeter and so i think it'll be good to use this quantity for that little sweetness)
  • 1/2 tsp ground cinnamon
  • a pinch of ground cloves 
  • a pinch of all spice powder
  • a pinch of ground nutmeg (i did not use this as i didn't have it)
  • a pinch salt
  • 2 tbsp butter, melted
  • 1 egg, lightly beaten
  • 2 tbsp candied fruits ( didn't use them)
  • 2 tbsp chopped raisins 
  • 2 tbsp chopped pista( my addition, not in original recipe) 
 For the Glaze:
  • 4 tbsp powdered or icing sugar
  • 1/2 tbsp milk or cream
 Procedure  : In a small saucepan, or in the microwave, heat the milk until lukewarm . Add the yeast and 1/2teaspoon white sugar and stir to combine. Set aside for about 10 minutes or until the yeast is foamy.
 

Meanwhile in another bowl combine the flour, sugar, spices, and salt. 


Once the yeast is foamy, gradually add to the flour mixture and beat until the dry ingredients are moistened.(i have used my electric mixer with dough kneading hooks to test my new gadget, but this can be easily done with your hand)


Add the melted butter and a little more than half of the beaten egg and mix until incorporated. 


 Gradually add the candied and dried fruit and continue to knead the dough until it is silky smooth and elastic. Add more flour if necessary.


 Place the dough in a lightly greased bowl, turning the dough once, so the top is lightly greased. Cover with plastic wrap or with a damp cloth and place in a warm spot to rise until it has almost doubled in size (about 1hour).


When the dough has doubled in size, gently punch it down to release the air, and divide into 6 equal pieces. Form each piece into a small round ball and place on a  lined baking tray . They should be spaced so they have enough room to double in size.
 Make an egg wash of the remaining beaten egg with 1/2 tablespoon milk or cream, and brush the tops of the buns with the wash.Place in a warm spot until almost doubled in size (about 1 hour).


Preheat oven to 400 degrees F (205 degrees C). Brush the tops of the buns with the egg wash again


, and with a sharp, lightly greased knife, cut a 'cross' on the top of each bun. 
Place the baking sheet in the preheated oven and bake for about 15 minutes, or until the buns are nicely browned and a toothpick inserted in the middle comes out clean. Place on a wire rack to cool completely before glazing.


Glaze: Combine the confectioners sugar and milk and mix until smooth. Place the glaze in a paper cone or a small plastic bag. Cut the end of the cone or bag and pipe a 'cross' on the top of each bun.

                 
 Wishing you all a very HAPPY EASTER
Happy Baking !!
Amrita


Friday 6 April 2012

The Making Of The Humble 'Aloo Parantha'


''Aloo Parantha ! Its too simple'', my husband exclaimed when i told him about my next post idea. ''We must post something that is exotic ,different and easy to make . Anybody can make aloo parantha''- was his explanation. So the poor humble aloo parantha remained silent inside my punjabi gut until yesterday when i had it at my mother's place.

I don't know what it is about ''Ma ke haath ka khaana''. It is always divine . For that matter i am so lucky to savour mouthwatering dishes from my mother's kitchen in kolkata and from my mother's (in-law) kitchen in allahabad . Lucky me !! I get to learn the best from them not just in cooking but in learning how to be a 'great mother '.

Well coming back to the fate of the aloo parantha, i decided to share the post as
a) it is utterly butterly delicious ,and
b) the parantha is full of the aloo filling ,reaching even the corners ,
 something which i have not seen anywhere else .That reminds me of my hostel days when the aloo in the parantha was concentrated only in the middle with bare roti on all sides ! And yes, we had no choice but to tear off the sides and eat the small middle part.
Sounds familiar ?? Well here is the recipe for that perfect Punjabi Aloo Parantha

Recipe Source - Dear Mother

Ingredients - ( For 2 people )
                     2-3 boiled potatoes (If smaller in size use 4)
                     1 tbsp finely chopped onion
                     1 tsp grated ginger
                     1-2 chopped green chillies
                     1 tbsp chopped coriander leaves
                     1/2 tsp jeera
                     1/2 tsp salt
                     1/4 tsp garam masala
                     1/4 tsp amchur powder
                      Prepared atta dough


Procedure - In a bowl mash the boiled potatoes and add onion, ginger, green chillies, coriander leaves, jeera, salt, garam masala and amchur powder. Mix them well.
Now take a handful of the atta dough and make a small round roti.Take a handful of the potato mixture (equal to the quantity of atta dough taken ) and put in the center of the roti.


   Fold the edges to cover the filling .


 Now cover it with flour on both sides and make a round shaped roti again . Note: everytime it sticks to your working surface ,use more flour before rolling it.Now add a good helping of ghee on the roti and spread it with your fingers.( My mother does this generously and i am very poor at it and thus the difference in our paranthas)


    Fold the dough from the edges to the center into a square shape .


  Now add more flour and roll it into a parantha.

       
 This double rolling of the dough (first round shape and then square) ensures that the filling has reached all the corners well.
Note: while lifting the parantha if it still sticks to your working surface , do not pull it. Instead use a knife to clear  it off the surface to avoid tearing.    
 Now put it on a preheated tawa and put some more ghee on at least one surface.


 Once you see the parantha browned well enough ,take it off the tawa.


 Serve while its still hot with fresh homemade curd and home churned butter !!


Enjoy !!            
Amrita


Sunday 1 April 2012

Comfort Food - Chocolate Cake


Comfort food is food that has a nostalgic and sentimental appeal.It is food that you are drawn to again and again.Usually something that you have grown up eating with. Something that you know'can never go wrong'. And the moment you put in your mouth ,you instantly know that this is what you wanted.


For me, one of my comfort food is the chocolate cake baked by my mother.The mere mention brings in memories of our home filled with that wonderful aroma of baked cake and how i would impatiently wait for her to take it out from the oven to the table . We never waited for the cake to cool down. It was instantly made,cut and eaten. Just like that !!
This was the only tried and tested recipe in our kitchen for a long time . So naturally for every occasion this was the cake baked at home . When we started celebrating my daughters monthly birthdays, this was the cake on the cards again !! This recipe has been used over and over again as my mother feels why try something 'jiska pata nahi hai ' ,safer to stick with 'OUR' cake !!


When we started with the blog idea , i told my husband that the first post has to be on sweet. After all ''meethe se hi to shubh shuruaat hoti hai''.but my seafood crazy husband tried his hands on this crazy seafood soup(which came out exceedingly well) and so he jumped on the blog wagon before i could start off on a sweet note .Nevertheless, here is my sweet start to our blog with my Comfort Chocolate Cake.


Recipe source : My mother 


Her method : Her measurements of the cake (believe it or not)is with the balance scale which you would have seen with vegetable sellers .( Yes , we have one at home !!)

                  All you need is to weigh refined flour, sugar and butter equal to the weight of the number of eggs you are using .
                   The butter we use is the one she makes at home -white butter. You need to collect the cream that collects on milk for some days and then churn it to get butter.Nowadays, you easily get white butter or unsalted butter in the markets.


Ingredients : 3 eggs
                   150 gms white butter / unsalted butter
                   1 cup sugar
                   1 and a half cup refined flour
                   50 gms chocolate
                   1 tbsp cocoa powder
                   1 and a half tsp baking powder
                   2 tbsp chopped walnuts


Mise en place (pronounced miz on plas) -means to have all your ingredients prepared and ready to go before you start cooking 

·                     Always start with your ingredients at room temperature
·                     Powder the sugar in the mixer after measurement
·                     Melt chocolate on a double boiler or in microwave for 45 secs 
·                     Grease and line your baking tin ( 9 inch round or any other shaped tin)
  
Procedure : Preheat your oven to 220 degree celcius. Mix butter and powdered sugar in a bowl and beat it with a spoon till it becomes creamy. (This step needs some hardwork as you need to beat the mixture for a good 4-5mins to get the beautiful fluffy texture of the cake). Sieve the refined flour, cocoa powder and baking powder. Beat the eggs. Mix the flour mixture and beaten eggs to the bowl of butter and sugar mixture. Mix it well so that no lumps are formed. Mix in the melted chocolate and walnuts and put this in the prepared baking tin . Cover with an aluminium foil and put in the preheated oven for 45 mins .Check whether your cake is baked by inserting a toothpick or a thin  knife .If it comes out clean,your cake is ready. Ideally let it cool on a wire rack for 5-10 mins or just jump on it like i do while it is still warm and moist !!


In the past i have baked this cake many times in different shaped tins and tried my hands on some icing too . There is no end to your creativity once you have the basic cake .Here are some of those cakes 


Happy Baking !!
Amrita

LinkWithin

Related Posts Plugin for WordPress, Blogger...