Saturday, 4 March 2017

Sweet and sour Vegetables-Vaanya's favourite


They say you can never understand the heart of a mother till you become one. Truly so, your world just flips over the moment you become a mother and it automatically starts revolving around the little one. Your likes, your dislikes, your things...everything takes a second seat and your child takes the center stage of your life. 
I have been thoroughly enjoying all the phases and stages of bringing up Vaanya. Most of the times, I realize I am doing things wrong and in the pursuit to mend things I learn it all over again. Life is a constant channel of learning new things, new skills, new emotions every single day. Life would have been such a drab if we think and believe that we know it all. 
Parenthood is not really a subject that you learn in college. It is an ongoing study of finding the best possible way of imparting knowledge, skills and emotions. The best way is to be an example to your children. I realized that I was doing so many things wrong till I wanted Vaanya to do them right and in that whole process I had to re-learn so many things.
One of the most common issue with parents is their child's eating issue. I have gone through different phases of this anxiety where Vaanya's not eating would freak me out to no end. With time I have understood that its okay for her to not eat or drink properly on certain days. As long as your child is healthy, it is silly to get anxious with little things. 
Every child has favourites in food and I feel very satisfied to see Vaanya enjoy her vegetables thoroughly. The sweet and sour vegetables was a very lame attempt from my side to try and make her eat all her favourite vegetables. It is the most easiest and simple recipe and one that I have made over and over again. Whenever I make it for Vaanya, I am assured that she will finish her food in no time and relish all the healthy vegetables in it.


Ingredients : For 2 servings
  • 1 carrot
  • handful of french beans
  • 4-5 mushrooms
  • 4-5 babycorn
  • handful sweet corn
  • few florets of broccoli
  • 5-6 cloves of garlic
  • half of an onion
  • 1 tomato
  • 2-3 tbsp Tomato ketchup
  • 2 tsp cornflour
  • salt to taste
  • 1 tsp sugar
  • Red chilli powder, optional
Procedure :
Peel and trim the vegetables as required
Cut them in bite size and keep aside.
Chop garlic finely.
Tear onion in rough pieces.
Chop tomato and keep aside.
Take 1 tbsp of refined oil in a pan and add garlic to it. Add carrot and french beans. Let them cook for 2-3 minutes.
Add broccoli and baby corn. Cook for 2 minutes and then put the mushroom, sweetcorn, onion and tomatoes. Add salt, sugar and tomato ketchup.
Cook for a minute and then add 2-3 cups of water.
Turn the flame to high and let the mixture come to a boil.
Dissolve cornflour in little water and add to the boiling mixture in a stream. Keep stirring till the mixture thickens. 
Check for consistency and adjust to your liking.
Serve with boiled rice.

Note : 
  • You may add or subtract vegetables to your liking
  • Add cooked chicken or fish pieces to it for a non veg version. 


Happy Parenthood
Amrita

Thursday, 26 January 2017

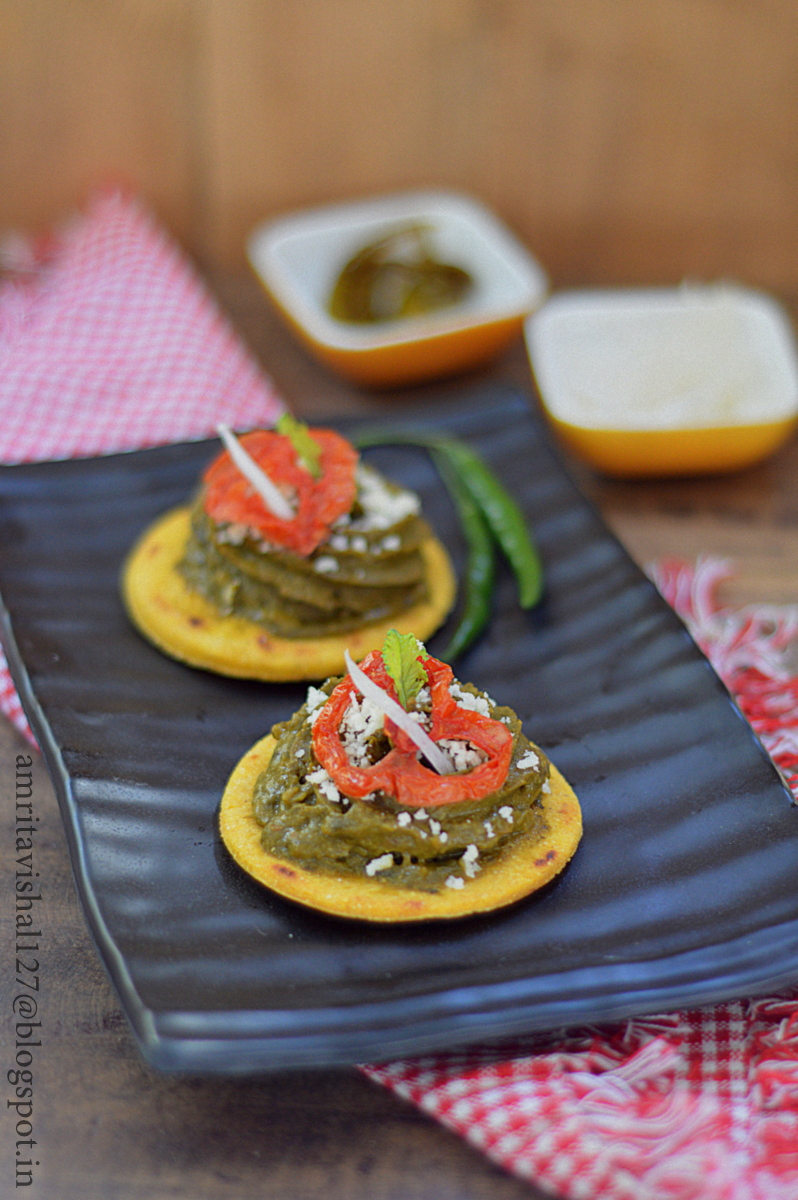
Sarson da saag with Makai di tart


As Winter comes, all homes in Punjab get geared up to prepare the most important, the most loved and the most respected meal-Sarson da saag and Makai di roti. This is not just another meal for us but is a meal which is synonymous to our culture and our existence. The sight of beautiful yellow flowers on the mustard plant are an invitation to the most coveted and most awaited meal during Winters. 
This hearty and healthy combination is supposed to warm the bodies to fight the bitter cold. The entire process of making Sarson da saag is not just a process but a ritual which is done very religiously. 
On my recent visit to Punjab, I was lucky to have sarson da saag from someones fields which was fresh and organic. The stem of the leaves of sarson da saag is called 'Gandalan' and a saag made using this part is supposed to be the best saag. The stem is first peeled and this is called 'Chirana' to remove any hard fibre and then all the leaves are washed. The leaves are then chopped using a traditional 'Daat' which is very much like a 'Boti' used in Bengal. The leaves are then cooked in the pressure cooker along with ginger-garlic-green chilly paste and then the saag is mashed using a traditional 'Madani' or 'Ghotna'. Makai atta is then added little by little to thicken the saag and give it some body. This is called 'Aalan'. Alternatively, besan or gehun atta can also be used. The saag is then again put to cook the rawness of the atta. 
Usually saag is cooked in more quantity as it stores very well. In fact, the older it gets the more tastier it gets. When required, a tadka of onions and tomato is given to the saag which is then served with a dollop of white butter or 'Chitta Makhan'. 
Since a recipe of Sarson da saag is so common and readily available everywhere on the net, I was more interested to present it in a little different and modern way. The perks of having an amazing Chef friend is that you can discuss your food planning and get incredible ideas and tips. And that is what lead me to attempt my hands on a Makai da tart. The entire innovative credit goes to my friend cum super chef Vikas Puri who very patiently helped me plan the styling. 
The recipe credit goes to my dear Kamal Masi who also very patiently helped me click and document each step of Saag making. The recipe and method shared here is the traditional way we make it at our home. 


Ingredients :


Organic greens-fresh produce from the farms
Sarson da Saag- For 7-8 servings

  • 3 bunch Sarson saag (Mustard leaves)
  • 1 bunch palak (spinach)
  • 1 bunch bathua (chenopodium leaves)
  • 1 bunch methi (fenugreek leaves)
  • 1 bunch methe, optional (a variety of fenugreek leaves)
  • handful of garlic leaves 
  • 2 tbsp ginger-garlic paste
  • 3-4 green chillies (less or more, according to taste)
  • 2 tbsp makai atta (maize flour)
  • salt to taste
  • ghee
Procedure : 

Sarson da saag : 

Peel the ends of the stems of the Sarson saag leaves. The stems are called 'Gandal' and a saag made of these gandals is a delicacy. Popularly saag made of these stems is called 'Gandalan da saag'. 


Wash all the leaves and then chop them. Traditionally it is done with an instrument called 'daat' in Punjabi (also called 'boti' in Bengali).


Heat 3 cups water in a pressure cooker and keep adding the chopped greens to it. Add more water if required. The chopped greens should get just about soaked in the water. 


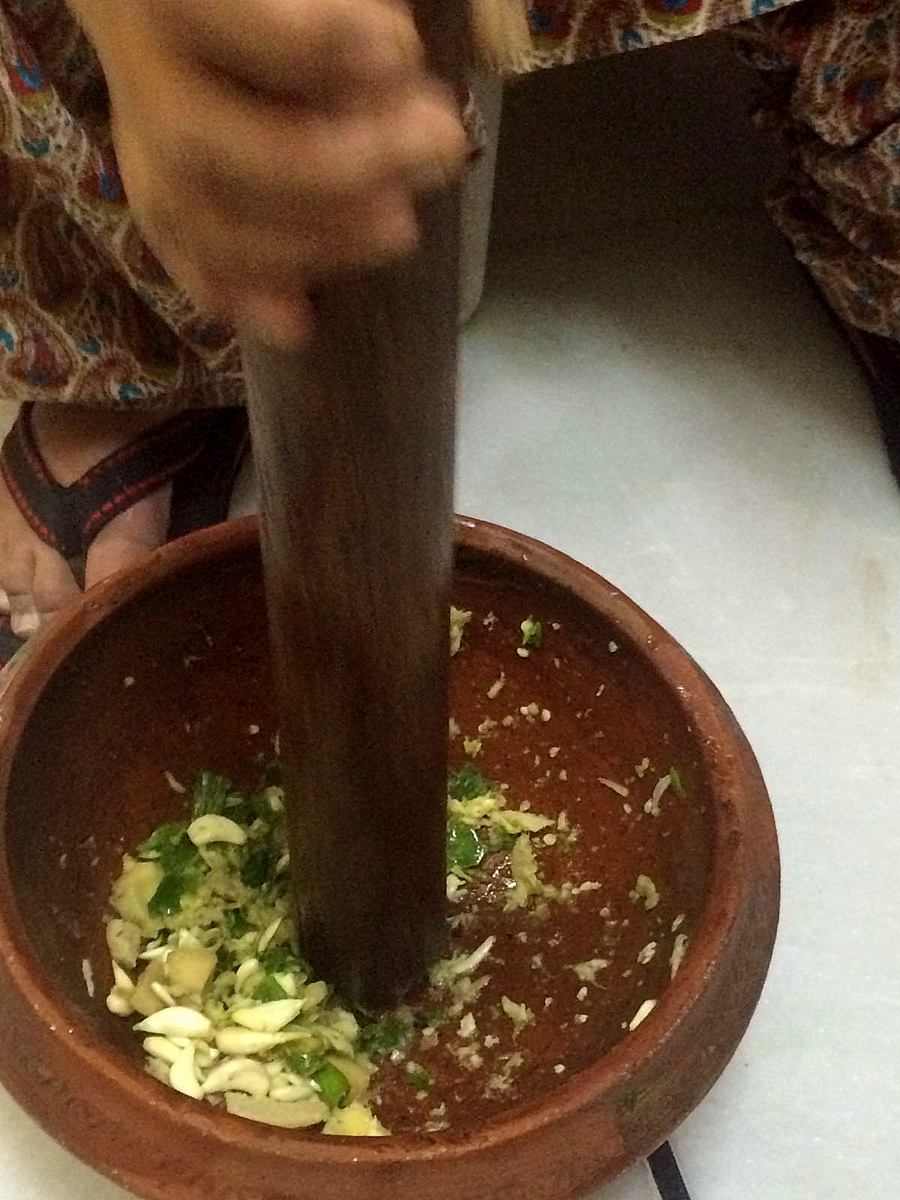
As the leaves get cooked, they will change colour and settle down. Stir it once in a while. Meanwhile prepare ginger-garlic-green chilly paste by grinding them all together.
Traditionally, it is done in a vessel called 'Kunda-Sota' where an earthen vessel is the 'Kunda' and a wooden stick is the 'Sota'. The masala is pounded in the kunda with the sota.  


Add the ginger-garlic-green chilly paste in the saag and mix it well. Add salt to taste.


Close the lid of the pressure cooker and allow one whistle on high flame. Thereafter, reduce the flame to minimum and let the saag cook for one hour. 
Let the steam escape and then mix the saag with a hand mixer. Traditionally a 'Madani' is used which is wooden and is popularly used to make Lassi. 
The saag is basically mashed up with the Madani which requires good arm strength. 


Once mashed, little by little makai atta is added to thicken the saag. Keep adding and mixing to reach a required consistency. Put the saag back to heat for about 5 minutes so that the rawness of the makai atta goes away. 


The saag will look something like this pic below-fruit of hard labour and love that goes into making it. 


Saag at this stage can be stored in the fridge for many days. Whatever amount is required is taken out, given a tadka and then eaten.
For Tadka, take ghee/refined oil in a pan and add chopped onions. As they brown a little add chopped tomatoes and then add saag. 
Do not forget to add the most important and coveted ingredient on top of saag before serving-a big dollop of white butter ! 

Sarson da saag with Makai di roti
Sarson da saag with Bajre di roti


Makai di roti : 
  • Makai atta (a handful for each roti required)
  • hot water for kneading
  • ghee for brushing
Procedure : 
Take makai atta in a bowl and add little by little hot water into it. I initially stir it with a spoon as the water is hot but usually women in Punjab are so used to handling the hot water due to extreme winter that they do the entire kneading with hand. 
Knead it to a soft dough and keep aside covered with a wet cloth. 
They say that the makai atta because of its coarse nature yields softer roti's if kneaded with hot water. 
I take a plastic sheet and put the required ball of dough inside, cover again with the plastic sheet and then roll the roti with a rolling pin. Very commonly in Punjab women make it by just placing the ball of dough on a plastic sheet and using wet fingers to make the roti. In earlier days women were expert to make the roti by just using their two hands, no plastic sheet, no rolling pin. 
Heat a tawa and place the roti on it. Let it cook both sides and then add ghee on at least one side to let it cook and get some dark brown spots on it. 

For a modern presentation, you may make small roundels of makai di roti and spoon the saag on it or you may even put saag in a piping bag and pipe on the roti like I did. Remember to keep the saag thick for this presentation. Grate some fresh paneer on top. Oven roast some slices of tomato with a sprinkle of salt and garnish on top. I used juliennes of white radish for garnishing and baby leaf of white radish. 


Makai di Tart : for 2-3 tartlets
  • 3/4 cup makai atta (maize flour)
  • 2-3 tbsp maida (all purpose flour)
  • 40 gms cold butter cut in cubes
  • little cold water for kneading dough
  • a pinch of salt

Procedure : 
Take Makai atta, all purpose flour and salt in a bowl and mix it. Add cold butter cubes in it and then rub the flour with the butter till the mixture resembles breadcrumbs in texture. Add little cold water (as much required) and knead to a dough. Wrap the dough in a cling wrap or a plastic sheet and refrigerate for 30 minutes. 
Preheat oven to 180 degree Celsius. 
Take the dough out from the fridge and leave it for 5-10 mins. Roll it out with a rolling pin and line a mini pie tin with it. Press it in the mould and cut excess from the edges. Take a fork and make few impressions to allow air to escape while baking so that the dough does not puff up. 
Bake for 10-15 minutes or till the tart is done.
Cool it and remove from tin.

Spoon a thick consistency of saag in it or pipe it with a star nozzle, as I have done. Garnish with a sprinkle of grated paneer, oven roasted tomato, julienne of radish and a radish leaf. 


Happy relishing
Amrita

Friday, 13 January 2017

Pinni


Its Lohri today! Lohri is an important festival of Punjab and is celebrated with utmost fun and fervor. It is popularly believed that Lohri marks the end of the bitter cold but traditionally it is associated with harvest of Rabi crops. It is celebrated on the 13th Jan every year and marks the last day of Paush and beginning of Magh(both Indian calendar months)  when the sun changes its course.
Like any other festivals, Lohri is associated with yummy food esp the winter must Sarson da saag and Makai di roti. Along with it people relish on Pinni, ganne di kheer, makhane di kheer. In the evening, bonfires are lit and everyone sits around spending lovely time singing, dancing, talking and eating Gajak, rewadi, chikki, moongphuli, popcorn etc
I remember when we were small, my Grandmother, ,my Aunt and my Mom would be busy throughout the day making delicious things for the evening bonfire. Amongst all the things I fondly remember my love for the kurmura ladoo which is made with puffed rice and jaggery.
While vacationing in Punjab recently, we had a relative who gave us heaps of homemade khoya. My elder Masi was quick to use it into some seriously out-of-the-world delicious Pinni. I was so amazed at the purity and simplicity of the recipe. Just mixing of few basic ingredients and you have such a yummy  traditional ladoo.
Try this super easy and super yummy Pinni from Punjab.


Recipe source : My Masi
Ingredients
  • 3 cups good quality khoya/mawa/milk solids
  • 1 cup whole wheat flour/atta
  • 1/2 cup ghee/clarified butter
  • 3/4- 1 cup desi khand/shakar bura/powdered sugar (depending on your taste)
Procedure : 
Take ghee in a heavy bottomed vessel and warm it. 
Add atta to the ghee and on a medium flame cook it. till it slightly changes colour.
Add sugar to it and mix well. 
Now add khoya and cook till everything comes together and mixes well.
Let it cool a little and then make balls out of it. Put a halved cashew on top or just let it be.


Note :
  • Use very good quality of khoya for Pinni. I used homemade khoya which I received from a relative on my trip to Punjab. 
  • Desi Khand or Shakar Bura is powdered sugar made of jaggery. It is healthier than using refined sugar. You can replace it with easily available powdered sugar. 
  • Adding cashew or almond or any other dry fruit is optional. You may even add chopped dry fruits in the mixture and then make Pinni out of it. 
Sending  this recipe to Kolkata Food Bloggers ongoing event 

Happy Lohri
Amrita

Saturday, 8 October 2016

Celebrating Durga Puja with some Natural sweetness


Durga Puja celebrations are on full swing.  Almost every locality is trying their best to showcase intricate craftsmanship and detailing on the Pandals. These pandals are a piece of art in itself where inspirations are drawn from all walks of life. So while, one pandal is highlighting the tribals and their lifestyle , another one has chosen the theme Butterfly or Prajapati, as they call in Bengali, this year. You truly have to see it to believe it that the decorations are so life like and so intricate. 

The essence of Durga Puja is an amalgamation of the culture, artistic expression and the joy of celebration. People get dressed up in their fineries and visit each pandal with enthusiasm and joy. Another thing celebrated during Puja with fervour is the love of food. People enjoy the nightlong Pandal hopping along with eating out.  From roadside stalls to high end restaurants, every place is full of people who are celebrating Ma Durga and her arrival on Earth. 


Food forms an integral and important part of the festivity. The young ones like to put their hands on streetfood like Puchka, jhalmuri , momo, ice cream etc . While some others like to indulge in traditional food, in the form of Amish and Niramish thali (Veg and Non veg).  

Streetfood is high on demand at this time of the year, where people like to just grab something on the go. Amongst others,  Ice creams are an eternal favourite with people of all ages. With the weather still humid and the scorching sun, people love to relieve the heat by indulging in some yummy Ice cream. Keeping the traditional flavours in mind, Mother Diary has come up with a new flavour, Nolen Gur Ice cream. Bengal is well known for the sweet Nolen gur available, which is basically date palm jiggery. This gur is used extensively in many traditional Bengali sweets and other desserts. Using the same gur in an ice cream, gives you a natural and organic sweetness. 


Us being, total Ice cream lovers, found ourselves digging into the Nolen gur Ice cream cups. The natural sweetness and the beautiful brownish hue of the Ice cream rings traditional bells and is a wonderful way to celebrate the season of Festivity.


It is available in pack sizes of 750 ml and 90 ml and is priced at Rs 150/- and Rs 20/- respectively. 

Happy Puja Binging

Disclaimer : This post is in association with Mother's Diary

Wednesday, 5 October 2016

Welcoming Festivities with fun, fervour and hygiene

India is the land of Festivals with each having its own charm and significance. The basic purpose being getting together and celebrating life in general with new clothes, gossips and lots of  food.  Month long preparations begin where meticulous plans are carried out to make the most of the upcoming festivity.

This time of the year brings along a string of festivals. With the nip in the air and the appearance of new blooms, nature announces the beginning of the most important  festival amongst Bengalis-Durga Puja. Calcutta being a very cosmopolitan city, it is amazing to see people from all religions get together to celebrate the festival of cuture, passion and artistic expression. All over  the city,  beautiful and intricate Pandals are set up which compete with each other in detailing, craftsmanship and innovation. 
Year long preparations are done to decide the theme, colours and the detailing which includes the idol Durga with her 4 children who are believed to have descended on Earth at this time of the year.

The run up to the celebrations include buying new clothes, getting rid of new and buying new things for the house and most importantly maintaining a clean and hygienic surrounding in and around the house.

The seasonal change brings with itself the appearance of all sorts of insects esp cockroaches in the house. Cockroaches are carriers of bacteria that can lead to an array of diseases from diarrhoea to food poisoning. The presence of cockroaches should be taken very seriously  as they can live in all places and corners of the house, in cracks and crevices, behind cylinders, under the cabinet etc. They crawl on food and utensils at night and spread food poisoning and they love to hide in hard to reach areas where regular cleaning does not help.

A regular cleaning regime becomes important to ensure a check on cockroaches and with the festival season approaching it becomes all the more important to combat them with sure shot methods. Some of the things to remember are never to leave food in open esp at night, ensuring areas like sink, under cabinet and around cylinder are clean as these are some of the most favourite hiding spots. The most effective way to maintain cleanliness in all areas is the usage of Godrej Lal Hit as it comes with its unique deep reach nozzle which helps to kill even the hidden cockroaches. Use Godrej Lal hit every month and ensure a safe hygienic and clean household.

Welcome the season of festivals with lots of fun , fervour and assurance from Godrej Lal hit to have your house free from the menace of cockroaches.

Happy Durga Puja to all of you.

Read more about Godrej Lal Hit here : http://www.godrejhit.com/product-lal-hit.html

You can buy it online from :
  
http://www.bigbasket.com/pd/40007017/hit-kills-hidden-cockroaches-400-ml/


Disclaimer : This post is in association with Godrej Lal Hit

Thursday, 29 September 2016

Doodh wali Tori/Turai/Jhinge/Ridge gourd


While growing up, I had no interest in food. I was too caught up with my love for music, needle work and everything else but food. Therefore, I never entered the kitchen but to seldom chop some onions for my mom. It was perhaps in those rare visits to the kitchen that I subconsciously picked up few recipes and techniques of cooking. Visual learning is pretty mighty, I discovered later in life. When I began my tryst with kitchen affairs, I would recall all of that and put them to experiment.
My Great Grand Father had come to Calcutta from Punjab and had set up his transport business. Living in Calcutta, my Great Grand-mother, my Grand-mother and then my mother adopted the local produce and used them in our typical Punjabi recipes. For example, we put the raw Papaya into our Parantha's and made a new avatar which nobody in Punjab is aware of. The raw banana found its way in our style of Kofta curry and the humble Jhinge/Ridge gourd found itself in a creamy milk and cream gravy.
This week, at Kolkata Food Bloggers the theme of our ongoing series of event is "Family Signature Recipes" where Debjani Chatterjee Alam is the featured blogger who blogs from Debjanir Rannaghar. For this event, I decided to share our family favourite recipe of Doodh wali Tori/Ridge gourd. 
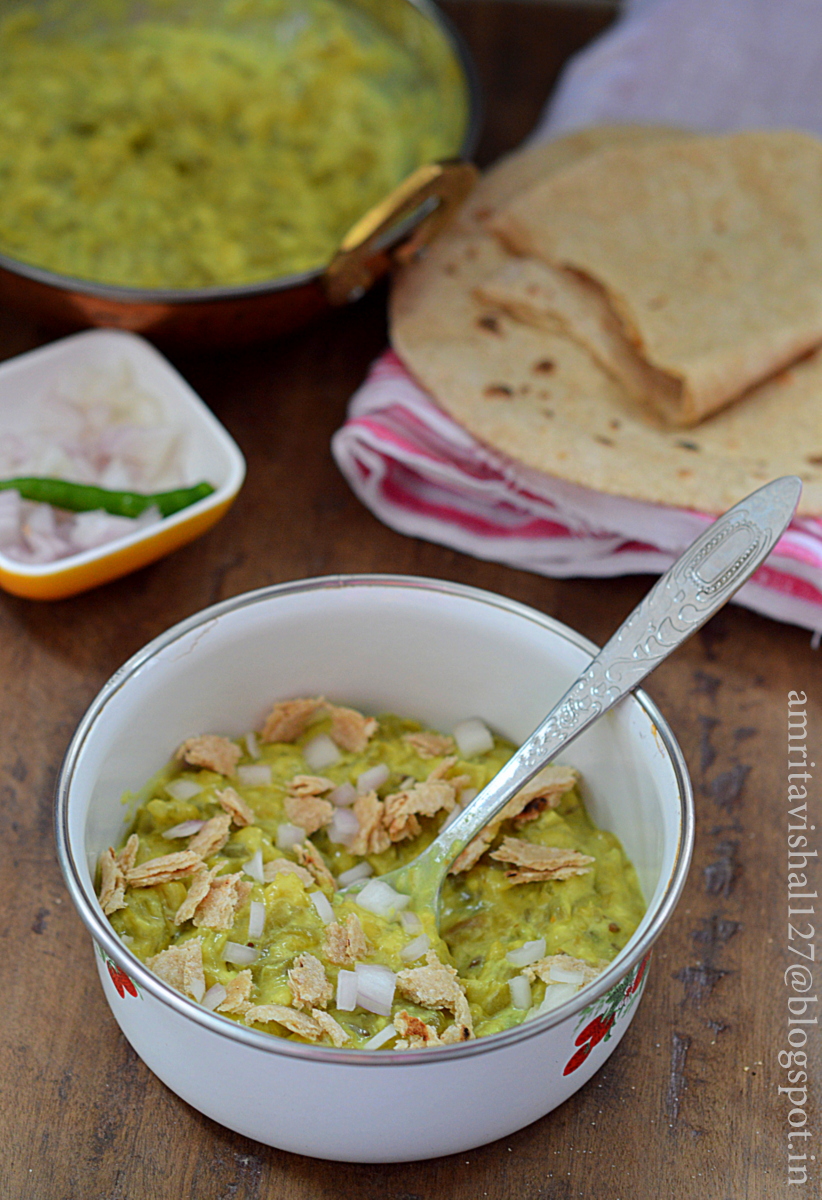
A super simple way of cooking the ridge gourd and then simmering it in milk and finishing up with some cream to give it a delicious creamy avatar. At home, at times, we make this dish with more milk and then dunk in small pieces of Roti and chopped onion to make it into a one bowl dish. 
Do try this rather amusing and simple dish of Tori/Jhinge/Ridge gourd and pair it with your Roti/Parantha and some onions.


Ingredients : For 2 servings
  • 4-5 Tori/Turai/Jhinge/Ridge gourd
  • 1 medium size onion, chopped
  • 3-4 cloves of garlic, chopped
  • 1-2 green chilly, chopped
  • 1 tsp cumin seeds
  • salt to taste
  • 1/4 tsp turmeric powder
  • 1/2 cup milk
  • 2 tbsp cream
  • 1 tbsp oil
Procedure : 
Peel and chop tori/ridge gourd.
Take oil in a pressure cooker and add cumin seeds. As they start spluttering, add chopped garlic, green chilly and onion. Let it cook for 2-3 minutes or till the onion becomes slightly brown. 
Add turmeric powder and salt and stir it well.
Add the chopped tori/ridge gourd and mix again.
Put the lid of the pressure cooker and allow 3-4 whistles on medium heat. 
Let the pressure release on its own.
Take a kadai/deep pan and add the cooked tori/ridge gourd. On medium heat, evaporate the excess water from the cooked tori. 
Now, add milk and let it cook on medium heat for 5-10 minutes or till the milk reduces to a required consistency. 
Finish off the dish by stirring in cream.

Our family favourite one bowl dish with small pieces of roti and chopped onions in the Doodh wali Tori/ridge gourd 

This recipe is part of KFB's ongoing event where Debjani is the featured blogger who blogs from Debjanir Rannaghar


Happy family recipe enjoying
Amrita

Tuesday, 16 August 2016

Ara’yes- Crispy Mutton mince stuffed Pita


I have been sharing so many posts on desserts and cakes that I have actually started feeling guilty for doing so. It makes me feel so unhealthy especially because I am very particular about our daily eating habits, trying to make it as healthy as possible. I exercise daily and adopt portion control to satiate my sweet desires. In fact even the desserts I make are just for 2 portions, my daughter Vaanya and my husband Vishal. 
Since Baking is my prime love, I cannot help but keep experimenting some form of it in my tiny kitchen. This time I decided to try some Savoury baking. With Kolkata Food Bloggers ongoing event 'Bake Mania', I decided to experiment with an interesting recipe I came across while going through a book called 'The middle Eastern kitchen' by Rukmini Iyer. 
As I learnt from the book, Ara’yes is a simple and traditional Levantine recipe which has a crispy meat stuffed Pita bread. The traditional recipes call for the raw mince meat to be mixed with spices and then stuffing it in the Pita bread to be baked, grilled or toasted. The book, however, suggested to cook the mince meat first and then stuffing it. I followed the idea in the book of cooking the meat first. The basic recipe of the mince meat is the one that I keep making at home, a basic and homely mutton keema recipe. I made the Pita breads at home and kept them a little thin than usual because I wanted a more crispy Ara’yes. 
Vaanya, my daughter loved it more than anyone else. In fact, while I was taking pics I thought that she will not be interested in it but when she saw me taking a bite of it, she got inquisitive and after the first bite she demanded more of it. That obviously made me super happy and we ended up making a dinner meal out of it. I paired my Ara’yes with a hung curd dip to which I added chopped onions, tomatoes and fresh coriander leaves. 
Make it more spicier to suit your taste buds and enjoy this crispy meat filled sandwich. 


Recipe Source : Adapted from Rukmini Iyer's book 'The Middle Eastern Kitchen'
Meat filling

Ingredients :

  • 300 gms Mutton mince
  • 1 medium sized onion, chopped
  • 1/2 tbsp ginger garlic paste
  • 1 tomato, grated
  • salt to taste
  • 1/4 tsp turmeric powder
  • 1 tsp garam masala powder
  • 1 tbsp refined oil

Whole Garam masala (Khada masala)

  • 1" cinnamon stick
  • 2 whole green cardamoms, slightly crushed
  • 1 whole black cardamom
  • 2 bay leaves
  • 4 cloves
  • 1-2 dry red chilli (de-seeded)
  • 4 whole black peppercorns
  • 1 tsp cumin seeds

Procedure : 
Wash the mutton mince and strain it to let the water drain out completely.
Heat oil in a pressure cooker and add the whole Garam masala (Khada masala). 
Now add the onions and cook on medium heat till they are brown in colour and nicely caramelized. 
Add the ginger garlic paste and cook till it leaves oil. 
Now add the mutton mince and stir it in well. 
It will leave some water. Keep cooking it on medium heat till the water evaporates. 
Cook till the mutton mince leaves oil. Now add the grated tomatoes and salt, turmeric powder and garam masala powder and cook for 5 more minutes. 
Add 1/2 cup water and close the lid of the pressure cooker. Cook for 2 whistles and then reduce the flame to low and cook for 15 minutes. 
Let steam escape naturally and if there is water in the mutton mince, reduce it on medium flame. 

Whole wheat Pita

Ingredients : Yields 4-5 pita breads
  • 1 cup whole wheat flour
  • 1 tsp instant yeast
  • 1 tbsp olive oil
  • 1 tsp salt
  • a pinch of sugar
  • warm water for kneading (about 1/2 cup)
Procedure : 
Take flour, instant yeast, salt, sugar and olive oil in a bowl. Mix well.
Add warm water little by little and knead it to a dough using water as required. 
Take a greased bowl and put the dough in it. Cover it with a damp piece of muslin cloth and allow to rise for an hour or more or till it doubles in size. 
Heat a griddle or tawa.
Make 5-6" round pita bread from the dough and put on the griddle on low heat. Cook both sides and allow it to puff up by placing it on the heat. 
Alternately, bake the pita bread in a preheated oven (at 200 degree Celsius) for 10 minutes or till it puffs up. 
Cut them in halves. 

Ara’yes assembly : 

Preheat oven to 180 degree Celsius.
Grease an oven tray.
Take halved pita breads and stuff them with the mutton mince mixture.
Brush with butter or olive oil and sprinkle some salt on it. 
Place these on the baking tray and bake for 15-20 minutes or till they become crispy. 

Serve with a dip made with hung curd, chopped onions, chopped tomatoes and chopped coriander leaves. 

This recipe is part of Kolkata Food Bloggers ongoing event called Bake Mania where our member Urmi Ghosh who blogs from Ume's Kitchen is the featured blogger of the week. 


Happy Savoury Baking
Amrita

Tuesday, 2 August 2016

Aloo Dum- low calorie version


When I was a school going kid, my tiffin was regularly hauled by my friends. Usually my Mom would pack me Parantha's of all possible fillings. On other days my tiffin beamed of sabzi and plain Parantha and on those fortunate lucky days I carried my treasured tiffin of my Mom's absolute lipsmacking Aloo Dum. My friends would finish it off even before the lunch bell rang, hiding beneath the desks and sneaking it while the teacher explained some boring subject on the blackboard. Yes, that was the magic of tiffin time that we all still cherish. 
I, on the other hand, loved my friends Puri sabzi and that addictive unstoppable fried goodness called Bhujiya. I just loved it so much. I was happy to trade my tiffin with their box of goodness. 
Whenever my friends came home, their was only one collective demand 'Aloo Dum'. My mom loved to plate it with generous dollops of tamarind chutney and some chopped fresh coriander leaves. She would put a toothpick on each making it easier for us to pick our's and relish it. 
With Kolkata Food Bloggers ongoing event on Street Food, I could think of nothing better than my Mom's Aloo Dum. Although now mommy makes a healthier version with the Airfryer so that the deep frying part is avoided. 
Make it and enjoy it as much as my friends always did. 


Ingredients : 
  • 500 gms baby potatoes, parboiled
  • 2 medium sized onions, chopped
  • 2 tsp ginger garlic paste
  • 1 medium sized tomato, chopped
  • 2 tbsp tomato puree
  • 1/2 cup curd
  • salt to taste
  • 1/4 tsp turmeric powder
  • 1 tsp red chilli powder
  • 2 tsp garam masala
  • fresh coriander, chopped
  • green chillies, chopped
  • Tamarind chutney
Procedure : 
Peel potatoes and make holes with a fork in 3-4 places. 
Take a bowl and add salt to taste, a pinch of turmeric powder and little refined oil. Coat the potatoes in it. Put this in the Airfryer for 10 minutes at 200 degree. Remember to turn the potatoes after 5 minute mark.
(If you do not have the Air fryer, deep fry the potatoes)


Take 2 tbsp oil in a deep pan, add chopped onions. Cook for 2 minutes and then add ginger garlic paste (once onions start browning on the edges)
Cook for another 2 minutes or till the mixture leaves oil.
Add the chopped tomatoes and cook them till they are soft and mashed. Add the tomato puree and cook till the mixture leaves oil.
Add salt, turmeric powder and red chilli powder. 
Lower the flame and add the lightly beaten curd. 
Mix the potatoes.
Garnish with coriander leaves and green chillies and top with spoonfuls of tamarind chutney before serving.

This recipe is part of Kolkata Food Bloggers ongoing event Street Food Expedition where Moumita Ghosh is the featured blogger of the week who blogs from Peek'n'Cook


Happy healthy binging
Amrita

LinkWithin

Related Posts Plugin for WordPress, Blogger...