Saturday 30 June 2012

Healthy Breakfast-Carrot Idli/Dosa


Breakfast options worry every wife and mother. Every morning the same question knocks on your head and makes you wonder ''Aaj kya banaye?'' For mums its all the more a challenge to make food nutritious as well as tasty. We all struggle to bring variety which suits our palate onto the table.
Most of the times things aren't as difficult as they look. A little effort and prior preparation can make a boring recipe quick, healthy and interesting.
This post is also to affirm that me, vishal and vaanya cook and eat healthy food too. I have been blogging so much about sinful delights that it was time to post a healthy one. Our kitchen is very experimental as Vishal & I keep encouraging each other to try new recipes with new ingredients and techniques. But our everyday food is so basic that we  feel its too simple to share. Probably thats the reason we haven't blogged on everyday recipes till now.
This recipe uses a store bought batter to make healthy breakfast which reduces the workload and makes it quick. I am also sharing a quick and easy recipe to make sambhar and coconut chutney.
Ingredients: For carrot Idli/Dosa
  • 2 cups store bought idli/dosa batter
  • 1 cup carrot puree
  • 2 tbsp chopped onion
  • 1 tbsp chopped green chilly(optional)
  • 1 tsp mustard seeds
  • 1 tsp urad dal
  • 1tsp chana dal
  • 10-12 curry leaves
  • salt to taste
Procedure:
Grate a carrot and blend with little water in a mixer to get 1 cup puree. Mix with 2 cups idli batter. Add chopped onions and green chilly. Add salt to taste.
Take 1 tbsp oil in a pan and add mustard seeds, urad dal, chana dal and curry leaves. Add this to the batter.
Grease lightly idli moulds (you can use a dhokla mould too) and put the batter. Steam for 15 mins.
If using dhokla mould cut in different shapes using a cookie cutter.
(I made 8 idlis. With the remaining batter I made dosa by spreading the same mixture on an oiled tawa)

Ingredients: For coconut chutney
  • 1/2 cup grated coconut
  • 1 tbsp roasted chana dal
  • 1 green chilly
  • salt to taste
  • 1 tsp mustard seeds
  • 8-10 curry leaves
  • 1 dried red chilly roughly chopped
Procedure
Add roasted chana dal (dry roast in a pan or tawa), green chilly, salt and little water to grated coconut and blend in a mixer.
Take 1 tbsp oil in a pan and add mustard seeds, curry leaves and dried red chilly and add this to the coconut chutney.


Ingredients: For sambhar
  • 1 cup arhar dal(also called toovar, toor dal)
  • Chopped vegetables of your choice. I used carrot and drumstick. You can use eggplant or lady finger
  • 4 tbsp tamarind pulp
  • 1 tbsp sambhar masala
  • 1 tsp red chilli powder
  • 1 tsp turmeric powder
  • salt to taste
  • 1 tsp mustard seeds
  • 10 curry leaves
  • 1 onion  chopped 
  • 2 tbsp tomato puree(or 1 tomato chopped)
Procedure:
Boil arhar dal with chopped vegetables and salt to taste in a pressure cooker. After 1 whistle, lower the flame and let it cook for 8-10 mins.
Mix tamarind pulp with salt, red chilli powder, turmeric powder and sambhar powder to make a thick paste. Keep aside.
In a pan take 1 tbsp oil and add mustard seeds, curry leaves. When it splutters add chopped onion. As the onion turns translucent add tomato puree. Let it cook for some time till the oil separates.
Now add the tamarind paste and cook for a minute.
Add the boiled dal with vegetables and add some water to attain the consistency you want.

Happy Eating
Amrita

Saturday 23 June 2012

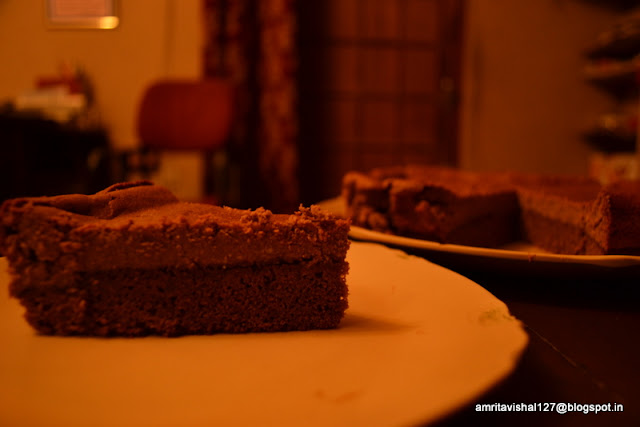
Muddy Gooey Chocolatey Brownies


'Chocolate' 
I am sure the universal expression to the mere mention of this word is a child like ear-to-ear grin and the urgent desire to have one in any available form asap(as soon as possible)
I am a big desert fan and an even bigger Chocolate desert fan. Give me the menu card and how much ever I try, I can't escape the sinful chocolate shouting itself to be picked up above other flavours!!
I found my partner in chocolate-crime in my dewar Kushal and my daughter Vaanya. The way she gobbled up these brownies was a sweet satisfied affirmation the she has gone on me !!
As Vaanya turns 13 months today, I am reminded of the wonderful time we had in Allahabad and Lucknow last month where we celebrated her 1st birthday. The baker in me had an even great time baking quite some of the old saved recipes. Needeless to mention all were chocolate based from Orange cake with chocolate ganacheBrownie bottom chocolate cheesecake, Rich chocolate Pie-tart, Chocolate mini tarts to these Brownies. Baker's Delight- All came out perfect  and i managed to finish an entire bar of cooking chocolate in a weeks time !!


Recipe credit goes to Purple Foodie

Ingredients:

  • 3/4 cup chocolate
  • 1/4 cup refined flour
  • 1/4 cup cocoa powder
  • ½ tsp baking powder
  • 1 cup unsalted butter
  • 1 cup powdered sugar
  • 3 eggs + 1 egg yolk


Procedure:

Preheat the oven to 180C. Grease and line a square baking tray.
In a small bowl, melt the chocolate on a double boiler or microwave for 1 min. Set aside.
Sift the flour, cocoa powder and baking powder together. Set aside.
In a bowl, mix the butter and sugar together until light and fluffy, then add the eggs.
Stir in the melted chocolate until thoroughly incorporated, and then finally, fold in the flour mixture, making sure that you don’t over mix the batter.
Pour it into the pan, and bake for 20-25 minutes. Test with a skewer- it should come out sticky with brownie clumped up in places, and not look like smooth, raw batter. If still underdone, switch off the oven, and pop it back in for another five minutes. Anything more than that will ruin it, because brownies continue to cook in all that trapped heat even after they’re pulled out of the oven.
Let it cool for at least an hour before you cut them in squares and serve them.
(Mine were little gooey in the center and i was planning to discard those pieces. Kept them thinking Kushal may like those pieces and rightly so, those were the best ones according to him !!)


Happy Baking 
Amrita

Monday 18 June 2012

The Mangolicious Affair


Summers throughout most parts of India is not one of the favourite seasons for many of us. Summers here are extremely hot with temperature soaring above 40 degree coupled with humidity around the coastal areas.

Remarkably in the middle of such discomfort Mother Earth has given us something that we all look forward to-Mangoes!
Mangoes are available in different ‘avatars’ in different regions of this country, each one having its own speciality.

This season my reason to wait for the king of fruits was to try some recipes that have been on my list for some time. This recipe is a no fussy, easy and ready-in-a-jiffy one.


Ingredients :
  •  1 cup mango pulp
  •  2 cups milk
  •  4 tbsp cream
  •  3 tbsp sugar
  •  1 tbsp gelatin
  •  2 tbsp vanilla custard powder


Procedure :

Heat the milk in a pan till it boils. Dissolve custard powder with some cold milk or water. Add sugar and dissolved custard to the hot milk. Stir continuously to get a thick custard.

Take gelatin in a bowl and pour about ¼ cup cold water. Wait for 5-10 mins till the gelatin becomes spongy and has soaked some water. Add to the custard. Stir well.

Add mango pulp and cream to the custard mixture and stir well to get a smooth consistency.

Once the mixture comes to room temperature transfer it to desert bowls or a mould and refrigerate for 1-2 hours or till the mixture sets. (I used a heart shaped mould to set the mixture)


Decorate with cream and slices of mango. (I used a scooper to get mango balls for decoration)


Happy Mango eating !!
Amrita

Sunday 10 June 2012

Low Calorie Potato Wafers


What are your first thoughts when you hear 'Potato Wafers'? Those who love it, may call it very yummy and crispy. Those who worry about the calories may call it oily.

Potato wafers are something all of us have had at some point of our lives. Very rarely will you find someone who does not like them. Nowadays it is a huge part of the new generation's diet culture. 
When we were in school, we used to have those desi fried potato wafers. Nowadays the markets are flooded with popular brands like Lays,Uncle chips etc. Go to any corner of our country and you can spot those small colourful packets of potato wafers. I see a lot of children wanting these colourful packets of calories and their parents having no choice but giving in to their demands. Hide as much as you can, you cannot escape because of the numerous ads and their easy availability.

When I came across this recipe I didn't think much of it. Majorly because this recipe calls for the use of microwave for making the potato wafers !! Now I am the kind of person (and I am sure a lot of the readers too)who use microwave only to warm up food stuff. I have tried 1-2 recipes in the microwave but have never been satisfied. I guess it is because we are the generation who trust in our 'chulha' more!
But the experimental chef in me gave it a try because it is very very simple and uses ingredients that we almost always have at home. I couldn't believe that the thinly sliced raw potatoes can become so crisp and crunchy in the microwave especially considering I do not have the convection mode in my microwave. 

The recipe credit goes to the blog I love to follow Cakes and more!  

Ingredients
  • 1-2 potatoes(as per your requirement)
  • 1 tbsp olive oil (you may use refined oil too)
  • salt to taste
  • red chilli powder to taste
  • 1 tsp dried thyme or oregano or any herb
  • 1 tsp garlic powder(optional) (you may try garlic paste)
Procedure

  •  Peel and wash potatoes

  • Slice them thinly with a slicer or a knife (slicer is recommended as you will get equal thickness of the wafers which will help in uniform cooking)

  • Pat dry all the slices

  • Take a bowl and mix oil with all the spices 

  • Dip the potato slices and coat them well in the oil and spices. Keep it aside for 5-10 mins.


  • Take the microwave plate, lightly grease it and place the slices all around the outer edge. Do not keep any in the middle of the plate as food kept in the middle of the plate gets cooked faster, and may cause it to burn by the time the rest of the slices are done. 
 
  •  Microwave on high for 1 1/2-2 mins. Turn all the slices and microwave again for 1 1/2-2 mins or till the slices turn brownish.
Note: It is recommended to keep a check intermittently less the slices should burn as microwaves vary with type and made.


  •  Leave them to cool for 5 mins and then devour them and be amazed by their crispness!!
 

I found a reason to try them again this weekend to team with the 'khichdi' I made. Needless to say I enjoyed those crispy low fat wafers with my khichdi-perfect combination !!


You can try a number of flavours- like a hint of tomato ketchup with spices for a tangy taste or some grated cheese with garlic for that cheesy yummies !! The choice is limitless.

Sending this recipe to Kolkata Food Bloggers ongoing event Microwave Expedition where Indrani (The Recipe Junction)is the featured blogger.   


Happy Microwaving !!
Amrita

Friday 1 June 2012

Brownie bottom Chocolate Cheesecake


Cheesecakes  are  a  rage in the western world and have now entered our desert menus too. Cheesecakes are essentially of two types-Baked and Non
baked. The baked one require eggs whereas the non-baked ones are eggless, set by using gelatin. 

The main component of a cheesecake is, of course, a cheese. Usually it is cream cheese (sometimes ricotta, quark etc). In our country till some years back cheese essentially meant either Processed cheese (Cheddar) or Pizza cheese (Mozzarella). But actually there are various varieties of cheeses, each specific to a country or region.

When I was reading about cheesecakes I began searching where to find cream cheese. The one usually suggested is of a brand called Philadelphia, nowadays available in the International section of supermarkets  but is a bit too expensive . A little more search helped me to understand the Indian name for it, which is "Chenna"(in hindi).  Yes, the one that is used to make those divine ‘Sandesh’ or  the one we mix with some onion and tomato to eat as bhurjee when the milk gets sour and splits!!

Once I zeroed on the main component, it was time to search for a recipe, which I found in Joy of Baking . I have actually compiled two different recipes to come up with my version of the Brownie Bottom Chocolate Cheesecake.

As exotic as they are, cheesecakes are actually very simple to make and turn out very yummy when made at home.


Ingredients
For the brownie base
·         ½  cup butter
·         2 tbsp dark chocolate
·         1 cup sugar(powdered)
·         2 eggs
·         ¼ cup milk
·         1 cup refined flour
·         ½ tsp salt

For the cheesecake
·      3 cups chenna (read note)
·      3 eggs
·      ½ cup hung curd
·      1 cup dark chocolate
·      ¾ cup sugar(powdered)

Note- To make 3 cups of chenna: Boil 2 litres of milk and add either 1 tsp of lemon juice or a pinch of citric acid to split the milk. Drain on a muslin cloth till the water separates. This milky water is Buttermilk which can be used to boil dal or any veggies or added in place of water to make yummy gravies. What remains in the muslin cloth is chenna. Once cool, blend chenna in a mixer to get a smooth consistency. This is Cream cheese.

Always have your ingredients at room temperature before you start baking .


Procedure

For the brownie
Preheat oven to 180 degree Celsius. Grease and line  9 inch square (or round)baking tin.
Melt chocolate in the microwave for 1 min and add butter by stirring well or melt chocolate and butter in a heavy saucepan on very low heat stirring constantly. Let it cool.
Add 1 cup powdered sugar and stir well.
Add 2 eggs, one at a time, mixing after each addition until blended. 
Add milk and mix well.
Mix flour and salt and add to the chocolate mixture, until blended.
Spread evenly on the prepared pan and bake for 25 mins or till a toothpick inserted in the middle comes out clean. Let it cool.
Note : No baking powder is required for the batter as we do not want a risen cake .


For the cheesecake -

Preheat oven to 180 degree Celsius.
Melt chocolate in the microwave for 1 min or on a double boiler till melted. Let it cool.
Mix the cream cheese and ¾ cup powdered sugar until blended well.
Add 3 eggs, one at a time, mixing after each addition until blended.
Blend in hung curd and melted chocolate.
Pour this mixture over the baked brownie and bake for 30-45 mins or until the centre is set.
Let it cool and then refrigerate for 4 hours or overnight before serving.

(Baked cheesecakes are ideally left in the fridge overnight. We obviously could not wait so long, so we devoured the cake within 4 hours of refrigeration!!)


A very big thanks to my dewar (brother-in-law) Kushal for taking amazing and mouthwatering pictures of the cake and for being such an inspiration for me to try all the goodies I have been wanting to bake for long time.


Happy Cheesecakemaking !!
Amrita

LinkWithin

Related Posts Plugin for WordPress, Blogger...