Thursday 29 November 2012

Khejur/Nolen/Gur-er Payesh/Kheer/Date palm Jaggery Rice Pudding


Winter is definitely the Foodie season!
With the nip in the air and the days getting shorter, its  the best time of the year to make and eat winter delicacies. Its also time of the year to have the markets flooded with Notun/Nolen/Khajur Gur/Jaggery. With so many synonyms, you may well understand its popularity in this part of the world. 
This type of Gur/Jaggery is basically made from boiling the sap of  Date Palm tree unlike the usual one which is made from sugarcane.
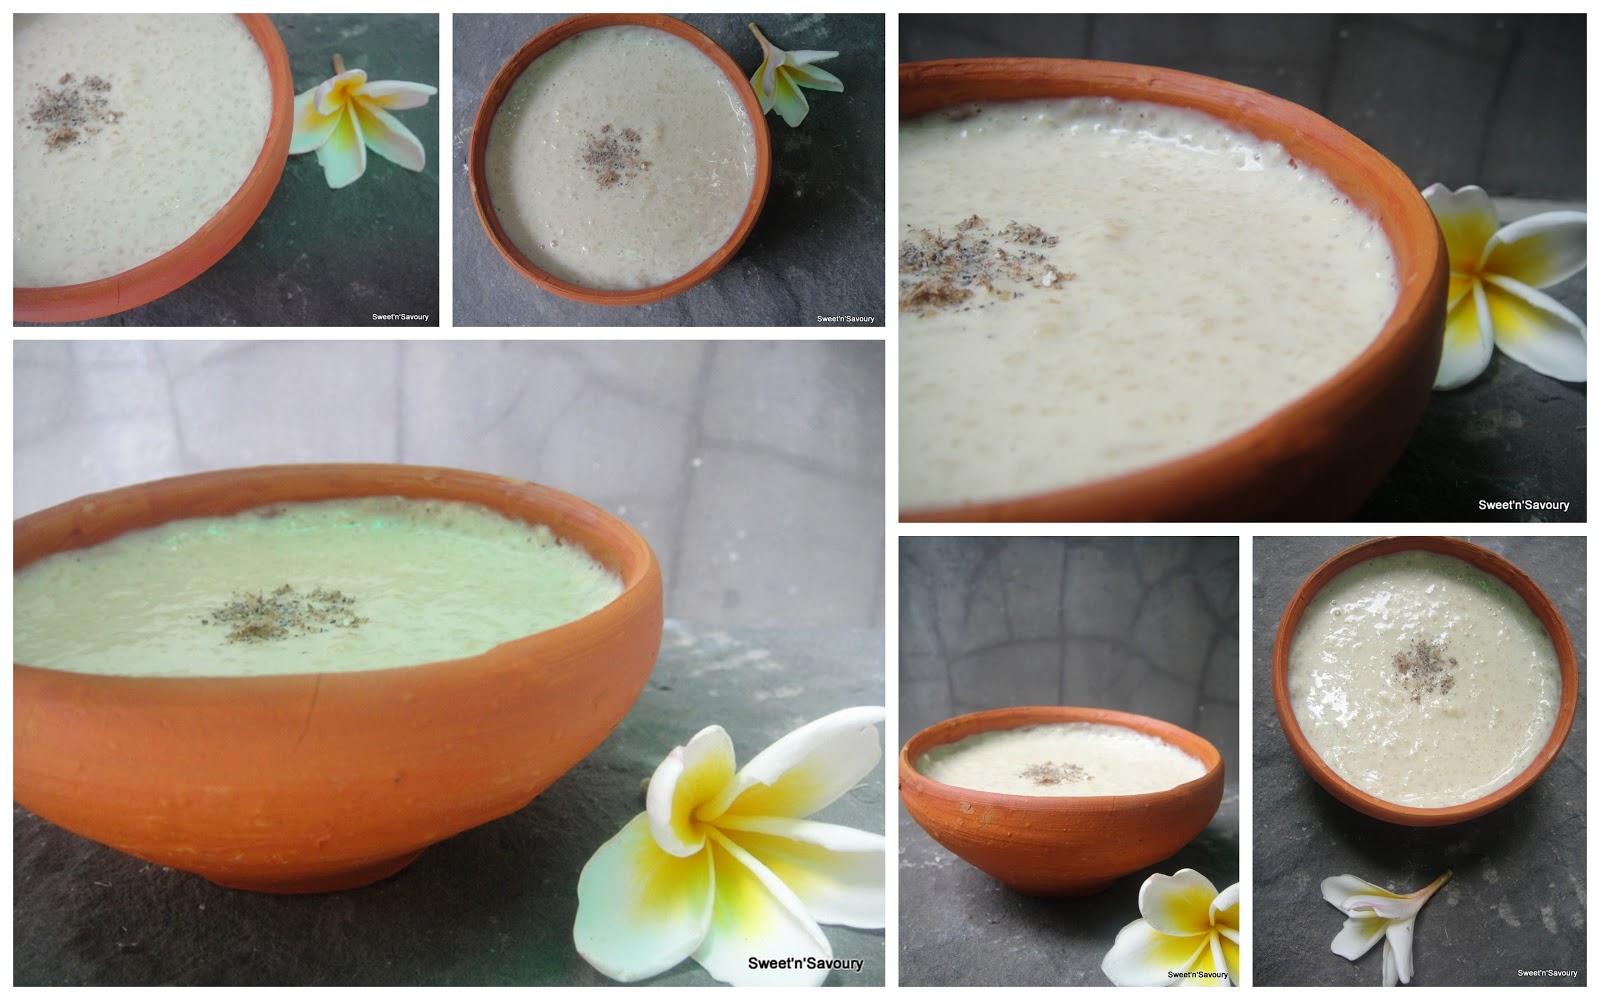
This very easy and traditional recipe served in an earthen pot with a lone Frangipani flower is my ode to mark the sweet beginning of the wonderful winter season and the sweet end of the event I have been Guest hosting for this month-Favorite Rice Dishes


Ingredients:
  • 1 litre milk
  • 2 tbsp rice
  • 3 tbsp notun/nolen gur/jaggery
  • 1 crushed cardamom for garnishing

Procedure:
Pour milk in a thick bottomed pan and bring it to a boil. Lower the flame and add washed rice.
On a medium flame let the milk cook, stirring continuously, till it reduces to half the quantity. This should take anywhere between 10-15 mins.
Once the milk has thickened to your desired consistency, turn the heat off and add the slightly crushed gur. Mix well and let it cool. Adjust sweetness to your liking.
Pour the cooled Payesh/Kheer/Rice pudding in an earthen bowl and garnish with crushed cardamoms.


Sending this recipe to Favorite Rice dishes


Happy Payesh Eating
Amrita

Wednesday 28 November 2012

Chicken Cheese & Fish Tikka Kebabs(Guest Post by Vishal !!)


Fellow wonderful bloggers, so far you have read recipes made and written by me, Amrita, and I believe you have known that this blog is a foodie journey started by me and my better half Vishal. He has been cooking for family and has been creating such amazing dishes that I have been begging him to post about them but his busy schedule always got the better of him. These Kebabs were made by Vishal for our daughter Vaanya's 18 month birthday party. Without any bias, I must admit they were loved and licked off to the last pieces!! On great insistence, I am so glad, I made him finally write on our blog. Please welcome him with your big heart. Over to hubby...(oh and sorry for the not so great pics as they weren't really clicked for the blog)

It is such a pleasure for me to see the blog that we as husband-wife duo created to where it stands now. It gives us more excitement to only fathom where it could go from here. All of the credit in the blog goes to my wonderful wife who has been so dedicated and enthusiastic to share our culinary experience and yes, behind the scene, she has made a lot of effort that has been more or less an out of the way sequel rather than a comfortable routine to put all of this together. So a big cheers to her.

This was a special occasion for me to cook as Amrita's wonderful parents, her brother and his wife were scheduled to come over for dinner. Everyone loved the kebabs so I reckoned to share it on the blog. They were very quick and very easy.My mother in Allahabad surprised us by gifting us a wonderful electric tandoor. So we made the most of it.


Chicken Cheese Kebabs (Amma's Recipe)

Ingredients:

  • 300 gms boneless Chicken cut in bite size pieces
  • 1 egg
  • 1 tbsp garlic-ginger-green chilli paste
  • 2 tbsp hung curd
  • 1/4 cup grated cheese
  • 1 tbsp fresh cream
  • 1/2 tsp black pepper powder
  • 1/4 tsp turmeric/haldi powder
  • salt to taste

Procedure:
Wash chicken pieces and take in a bowl. 
Add all the ingredients and mix well.
Leave to marinade for 2 hours(preferably)
Soak some wooden skewers in water for half an hour or so. 
Preheat oven/tandoor to more than 200 degrees Celsius.
Gently push each chicken piece into the wooden skewers.
Put them in a foil lined tray in the oven/tandoor.
Baste the chicken in oil/ ghee after two minutes or so in the oven and put it back again.
Cook for 4-6 mins or till chicken gets cooked well with a nice brown tinge.


Fish Tikka Kebabs

Although the Calcutta Bhetki is best suited for this, you can try this on any other fish.

Ingredients:
  • 500gms Bhetki fillet cut into bite size cubes
  • 2 tbsp fresh garlic paste
  • juice of 1/2 lemon
  • 2 tsp turmeric powder
  • 2 tsp red chili powder
  • 2 tsp Black Pepper Powder
  • salt to taste
  • Green Capsicum Cut into cubes
  • Lettuce leaves, Onion slices, Lime wedges (to garnish)
Procedure:
Clean and cut the fish fillet into bite size cubes.
Mix all the ingredients together except the ones to garnish.
Leave it to marinade for two hours (preferably).
Soak some wooden skewers in water for half an hour or so. 
Preheat oven/tandoor to more than 200 degrees Celsius.
Gently push each fish cube into the wooden skewers, alternating them with green capsicum pieces. 
Put them in a foil lined tray in the oven/tandoor.
Baste the fish in oil/ ghee after two minutes or so in the oven and put it back again.
Fish cooks very fast so give it around 3-4 minutes to cook.


Rest the kebab for a couple of minutes before serving them garnished with onion slices, lemon and fresh lettuce leaves.

Sending this recipe to 60 days to Christmas

Happy Kebab eating
Vishal

Monday 26 November 2012

Fried Rice-Mummy style


There is a nip in the air and that means winter is very near
Winter, I believe, is the most enjoyable season for a foodie. With the markets full of fresh inviting fruits and vegetables, there cannot be reasons enough not to don your aprons and enjoy the seasonal goodies.
Its time of the year to have steaming hot soups, wonderful roasts and rich cakes!!(oh how the last word makes me drool!!)
Today, however, I am sharing our winter favorite which uses leftover rice with a host of vegetables and boiled egg. Quite a meal in itself. My mother loves to add a dash of green chilli sauce, aka Kolkata style and a handful of fried cashewnuts, Punjabi style!!! It definitely is a great way to welcome and enjoy the season.


Ingredients:
  • 1 cup boiled rice(I used leftover)
  • 1 small potato, chopped
  • 1 small carrot, diced in small pieces
  • 4-5 french beans, chopped
  • a few florets of cauliflower
  • A small piece of cabbage, sliced
  • 1/4 of a capsicum, chopped
  • 1/2 medium size onion, sliced
  • 1 boiled egg
  • A handful of cahewnuts
  • 1 tsp green chilli sauce
  • salt to taste
  • few leaves of mint for garnishing


Procedure:
In a pan, take 4 tbsp oil and fry cashewnuts. Drain them on a kitchen paper
Now add chopped potato. When cooked well, drain them . 
Now add carrot, french beans and cauliflower and fry them till cooked and drain them. 
Add capsicum and cabbage and cook them for just a minute to preserve their crunchiness. Drain them.
Now add sliced onions and cook till they turn pink, add salt to taste and green chilli sauce. Mix well.
Add all the cooked veggies and the rice. Mix very well. Check for seasoning and adjust. 
Sprinkle the fried cashewnuts and mint leaves.
Place sliced boiled egg on top and the dish is ready to serve.


Happy Rice eating
Amrita

Saturday 24 November 2012

Brownie Tart with Chocolate Pockets-For my 'Sweet day'


'Its a GIRL'!! 
These were the magical words I heard exactly one and a half years back. All through my pregnancy I was sure we were having a boy..I don't know why..I guess it was just a stupid instinct. I was so sure that even till the 9th month we could not think of a girl name.
I kept insisting Vishal to think of one in case we had a girl. Finally 'Vaanya' was suggested by Amma(mother-in-law) and we instantly liked it. 
Vaanya means Gracious gift of God' and she sure is the most beautiful and the most precious gift from the Almighty. We as parents feel so blessed and thank God for sending us an angel. 
Today as she turns one and a half years old, I wonder where time flew. Just yesterday she was this tiny baby  who could not move and today she is so swift that I can't keep up to her!! She is learning a new word everyday and says the most sweetest things in her most beautiful voice. 
Daughter are truly a blessing to parents. May God bless her abundantly always.

Daughter are angels sent from above to fill our heart with unending love-- J. Lee


This Brownie Tart is essentially a brownie baked in a tart tin. It is dense in texture as any brownie is meant to be. The chocolate ganache filled pockets which just melts in your mouth is the biggest 'Brownie point' about this bake.

Recipe Source: Adapted from Joy Of Baking

Ingredients: Makes a 9 inch brownie tart
  • 1 cup walnuts, toasted and chopped into pieces
  • 1/2 cup(100 gms) unsalted butter, in room temperature
  • A little less than 1/2 cup(85 gms) dark chocolate
  • 1/2 cup cocoa powder
  • 1 cup sugar, powdered
  • 3 eggs
  • 2 tsp vanilla extract
  • 1/2 cup(85 gms) cream cheese or finely mashed Paneer
  • 1/2 cup refined flour
  • 1/4 teaspoon salt
Ganache:For the chocolate pockets
  • 1/4 cup semisweet chocolate, coarsely chopped
  • 3 tbsp cream
Procedure:
Preheat oven to 170 degree Celsius and toast walnuts for 8-10 minutes until lightly browned. Cool and chop into small pieces.
Reduce the temperature to 165 degree Celsius.
Grease a 9 inch tart pan with a removable bottom, and line the bottom of the pan with parchment/butter paper.
Melt chocolate on a double boiler or microwave for 1 minute. Mix in the butter.
Transfer to a larger bowl and mix in the cocoa powder and sugar in the chocolate mixture.
Add eggs, one at a time, beating well after each addition.
Now mix in the cream cheese/mashed paneer. You may have to use a mixer to get a smooth consistency.
Add the flour and mix just till incorporated. 
Stir in the nuts.
Pour the batter in the tart pan and spread it evenly with a spatula or the back of a spoon. The batter will be quite thick and will fill the pan almost to the top.
Place the tart pan onto a large baking sheet to catch any drips.
Bake for 30-35 minutes or till a toothpick inserted in the middle comes out clean. 
Remove from oven and place on a wire rack to cool.

Make the Ganache while the tart cools:
Place the chopped chocolate in a small bowl.
Heat the cream in a small saucepan over medium heat and bring it to a boil. Immediately pour the boiling cream over the chocolate and allow to stand for 5 minutes. Stir until smooth.

Make holes carefully on the top of the brownie tart with a greased spoon end or a small round cookie cutter or with a small melon scooper, like I did. 
Now fill the holes with the prepared ganache.
The ganache may sink as it cools so add more as required. 
Let the tart cool completely and then cover and refrigerate. 
Best to make this tart a day before serving to allow the flavors to blend.


Linking this recipe to 60 days to christmas

Happy Brownie-tart Eating
Amrita

Tuesday 20 November 2012

Sweet/Mishti Pulao with Spicy Aloo Dum


There are some combinations in life that complement each other so well that they seem to be ordained from Heaven. However, there are some that are poles apart and completely opposites in nature but dramatically come together to bring about an entirely amazing synergy. 
'The Sweet Pulao with Spicy Aloo Dum' is one such traditional combination that looks completely opposite but has an amazing chemistry when they come together. Made usually as a part of 'bhog' during Durga puja without the usage of onions and garlic, this sweet and spicy combination is our family favorite. We wait for this prasad every year as eagerly as any bengali would. You see, living in Kolkata can make every bit of you a crazy foodie!!
This version, however, is not the authentic bhog one as I have used both onions and garlic in it as a personal choice. The sweetness of the pulao together with the 'spiciness' of the potatoes is truly an awesome combination and it leaves your palate with very interesting flavours...a foodie match made in heaven!!


Ingredients: Sweet/Mishti Pulao
  • 1 cup rice (I used a variety called Govindbhog.You can also use Basmati)
  • 1/2 cup sugar
  • 2 cups water
  • 2 Bay leaves
  • a pinch of Javitri/mace
  • a pinch of Jaiphal/nutmeg
  • 1 inch piece of dalchini/cinnamon
  • 3-4 laung/clove
  • a pinch of jeera/cumin seeds
  • 3-4 choti elaichi/green cardamom
  • 1 inch piece of ginger
  • Salt to taste
  • A few drops of yellow food colour


Procedure:
Wash and drain rice and keep aside.
Make a fine wet paste of Javitri, jaiphal, dalchini, laung, jeera, choti elaichi and ginger. 
Take 2 cups of water in a pan and boil it. Add salt,  1/2 cup sugar and few drops of yellow food colour. Let this mixture boil again and keep it on low flame.
Take 2 tbsp oil in a deep pan and add bay leaves. After a little while add rice. Stir well and cook for a minute. 
Add the wet paste of spices and mix well. 
Now add the boiled water and sugar mixture in rice and stir well.
Cover with a lid and let it cook for about 10 mins or till the water has evaporated and rice is done.


Ingredients: For spicy Aloo Dum
  • 4 Aloo/Potatoes
  • 1 Bay leaf
  • 1 medium size onion, sliced
  • 1 medium size tomato, chopped
  • 1 tbsp ginger-garlic-green chilly paste
  • 1/2 tsp haldi/turmeric powder
  • 1 tsp lal mirch/red chilli powder
  • salt to taste
  • Chopped coriander leaves for garnishing


Procedure:
Wash and peel potatoes. Cut them in quarters.
Take 2 tbsp oil in a deep pan, add salt and bay leaf.
Add the potatoes and cook for 5 mins on high flame stirring continously. 
Add sliced onion and cook till the potatoes are half done.
Add chopped tomatoes and ginger garlic paste. Add haldi and lal mirch powder and stir well. 
Put little water and cover the pan with a lid for 5 minutes or till the potatoes are cooked well.
Garnish with chopped coriander leaves.


For Favorite Rice Dishes

Happy 'sweet & spicy' eating
Amrita


Saturday 17 November 2012

Eggless Whole Wheat Dinner rolls


Time for our monthly Baking Partners challenge and this time Dinner rolls were chosen to celebrate the season of Thanksgiving. As always Swathi, the brainchild of Baking Partners, send us the challenge with details and recipes a month back. And as always I kept postponing attempting these beauties till the last hour. I guess I was just scared to try and shape them and kept wondering which ones to attempt. 
To be honest, I wasn't sure about them till I baked. It was extremely exciting shaping them and watching them getting baked. Would love to try more shapes in the future.


Ingredients: I halved the recipe to get 8 different shaped eggless dinner rolls

  • 1 cup all purpose flour
  • 3/4 cup whole wheat flour
  • 2/3 cup boiled and mashed potato
  • 1 tsp instant yeast
  • 1/4 cup lukewarm milk
  • 2 tbsp sugar
  • 1/2 tsp salt
  • 2 tbsp butter, softened
For topping

  • a little milk for brushing the dinner rolls before baking
  • Few white sesame seeds and onion seeds for sprinkling
  • Melted butter to brush after baking


Procedure:
Combine both flours, salt, sugar, yeast, mashed potato and butter in a bowl. Mix well.
Add lukewarm milk and knead to a smooth and soft dough.
Put the dough in a well greased bowl and cover with a damp cloth in a warm place for an hour or till the dough is double in size.
Deflate the dough and shape it as per the shapes shown below. 

Clover leaf shape
Roll dough in 3 small balls and place in a greased muffin tin in a triangle form.


Kaiser or Rosette shape:
Roll dough 4 inch long, thicker from the middle and thinner from both ends


Bring the two ends together overlapping them as in making a knot.


 Pull the ends as in a knot.


The end on top is tucked under the bun and the one beneath is pulled up and tucked on top.


 Refer here for a detailed video demonstration.

Lion House Rolls
Roll dough in a square 4 inch long and 4 inch wide

Cut the dough from the middle to get a 4 inch long and 2 inch wide piece.
Now roll them to get the shape.


Small Braid
Roll dough 7 inch long and 3 inch wide, a little rounded at the edges.


With a knife or pizza cutter make 3 cuts leaving one end(not all the way long)


Braid the pieces to get the shape. Tuck in the ends.


Here are my shaped dinner rolls before baking


Arrange them on a greased baking tray.
Cover and allow the buns to rise and double in size for an hour.
Towards the end of rising time, preheat oven to 200 degree Celsius.
Brush the buns with milk and sprinkle sesame and/or onion seeds to your preference. Bake for 15-20 mins or till golden brown in colour. 
Remove buns from oven and brush with melted butter.
Serve warm and store leftovers well-wrapped at room temperature.


Sending this recipe to Christmas Event

Happy Dinner Roll Making and Eating
Amrita

LinkWithin

Related Posts Plugin for WordPress, Blogger...